Showing posts with label dessert. Show all posts

Wednesday, December 21, 2011

Maple Nutmeg Butter Cookies

First of all, you should know that you can only make these cookies for people you love.  Because cookies that require chilling, rolling, and cookie cutters are only worth it for people you love.

That said, you should make these cookies.  You should make them on a night when you don't have a lot else going on, because they are going to take some time and you are going to make quite the mess, my little cookie queen (or king).

You should also be aware that when these cookies are implemented as a bargaining tool in a cookie exchange, they are both a blessing and a curse.
Blessing:  You get mad compliments.
Curse:  You don't want to give them away.  Blast, that buttery, maple goodness is so sneaky like that.


I found this recipe over at Smitten Kitchen.  This woman is the heat, no lie.  She has performed a great miracle and has achieved a lofty goal.  A goal that I aspire to.  This snazzy lady makes her living by literally rolling out of bed, cooking whatever she feels like at that particular juncture in time and blogging about it.  And she's worked hard to get there.  Rock on, Deb.  Live the dream.

Maple Nutmeg Butter Cookies
Ever-so-lightly adapted from Smitten Kitchen.

1 cup (2 sticks) salted butter, at room temperature (I used Plugra)
1 cup (200 grams) granulated sugar
1/2 cup maple syrup (Grade B makes for an explosion of maple flavor, but use Grade A in a pinch)
1 large egg yolk
3 cups all-purpose flour
1/2 teaspoon freshly grated nutmeg
1 teaspoon kosher salt


You know what?  "They" say you should bake with unsalted butter.  I never do, probably never will.  I think it tastes more buttery with the salt, thank-you-very-much.  Do what you feel.

Use a stand mixer (if you have one and are obsessed with it like me) to combine butter and sugar with the paddle attachment until fluffy.  Add egg yolk.  Drizzle in maple syrup.  Lick cup measure. What?  Sorry.
In a separate bowl, stir together flour, salt and nutmeg.  Add flour mixture into butter mixture, just until combined.  Divide your crumbly dough into 4 balls, wrap each in plastic wrap, chill in the fridge for at least two hours, or overnight.  Don't skip this step even though you're tempted.  I have skipped this step a million and a half times, and then I pout about why I can't roll out my dough and make pretty shapes.  Cry baby.

Preheat your oven to 350 and line at least a couple baking sheets with parchment paper.  If you use wax paper instead, you'll set your ever-loving house on fire.  True story.

Flour your very clean counter top or kitchen table with a handful of flour.  Keep the flour handy so the dough doesn't stick to the table, your hands, or your rolling pin.  Yes, you're going to need a rolling pin.  Don't have one?  Use an empty wine bottle, you lush.  Take one of your four doughballs out of the fridge.  Unwrap.  Plop in flour.  Beat the living daylights out of it with your rolling pin until it sweetly submits.  Roll out your dough about 1/8 inch thick and cut fun little shapes out.  If you don't have cookie cutters you are a terribly boring person, you can use the mouth of a jar to cut perfect little circles.  Cut cookies go on the parchment and into the oven for 8 minutes.  For smaller cookies, watch them and maybe take them out at 7 minutes, depending on how browned you want your cookies.  Ball up your dough scraps and wrap them and refrigerate them for after you have used up your initial dough balls.  When your cookies are done, remove the batch from the oven and slide the whole sheet of parchment and cookies off the pan so your pan can cool and be reused for another batch.  If you have cooling racks, use them now.  If you are like me and you don't have cooling racks, ask for some for Christmas.

Confession time.  I got so sick of all that leftover dough (that I had already worked and thus was more pliable than I wanted) I threw out at least a handful of it at the end.  By the Beard of Zeus, I already had like 5 dozen cookies!  Remember, there's no judgement here.  I won't tell the baking police, I promise.  Take that last batch out of the oven, clean your flour coated kitchen filled with destruction and cookies, and go have a glass of eggnog with a cookie.  You deserve it.


And how did that cookie exchange go?  I think I came out on top with some pretty good loot (and some of my leftover maple cookies I secretly hoarded).

Monday, December 19, 2011

Eggnog Tiramisu and Sunday in Pictures

Eggnog Tiramisu loves you.

I made this for you.  Okay, so I really made it for our family Christmas gathering on my mom's side, but I totally thought of you while making it.  And the best part- it's so simple to make, yet totally elegant!  Eggnog and Tiramisu become their best selves when the two become one.  But more on that later.  Here's how yesterday looked:
Family coziness
We obviously know how to tear into some delicious appetizers.  Mmm.  Shrimp.
Ian made his signature mashed potatoes with goat cheese and rosemary, which were stunning.  Watch him work.


Dad was the star of the show with his succulent (ew! I can't believe I just used that word) standing rib roast grilled masterfully on his Weber Kettle Grill.


Juicy Vittles

Fire pit for keeping roasty toasty while sipping a hot toddy.
Today's hot toddy of choice was spiced cider with black spiced rum.  Speaking of rum, you're gonna need some to make this killer dessert.

Eggnog Tiramisu
Custard
3 large eggs, lightly beaten
3 cups organic whole milk
3 Tbsp cornstarch
2 tsp pure vanilla extract
2 tsp freshly grated nutmeg
1/2 cup sugar
2 Tbsp butter

Espresso Soak
1/2 cup black spiced rum (The Kraken is what I used.  My favorite!)
3 Tbsp espresso powder
1/4 cup water
1/3 cup sugar

1 package almond cookies, crushed
1 handful Slivered or chopped almonds (optional)
1 whole angel food cake (you could sub out lady fingers if you so desire)

Whipped Cream
1 pint heavy whipping cream
1/3 cup sugar
1/4 cup frangelico (hazelnut liquor)
1 tsp vanilla

This looks like a lot of ingredients, but it's actually really simple and all about layering.  Promise.  Let's start by making pudding from scratch.  This is one of the first things I really remember making by myself and being proud of.  I was thirteen-ish?  My mom had this checkered Better Homes and Gardens Cookbook (your mom probably has one too) and it made pudding from scratch pretty simple business.  If you leave the nutmeg out of this eggnog custard, BAM!  You have vanilla pudding.  Don't buy Jello.  I love you too much to let that happen to you ever again.
Custard
In a heavy bottomed saucepan, combine milk and sugar over medium heat.  In a separate small container, stir in a little milk from the pan into the cornstarch until there are no lumps.  Pour it all back in the pan.  Stir frequently until the milk is "scalded."  This means there will be little bubbles all around the edges where the milk touches the pan, and it will smell cooked.  In the meantime, crack and lightly beat your eggs in a bowl.  Keep at the ready. When your milk is scalded, remove the pan from the heat.  Add a few tablespoons of the hot milk mixture in a slow and steady stream into your eggs.  Beat continuously while doing this.  We're just bringing the eggs up to temperature so they don't curdle when we put them in the milk.  After you've incorporated a little of the milk into the eggs, slowly pour a steady stream of the egg mixture into the pan with the milk, mixing continuously to avoid curdling.  This is called tempering your eggs.  No biggie.
Cook for two to three minutes more over medium heat while stirring.  When the mixture has thickened into a loose pudding consistency, remove from the heat.  Stir in vanilla and butter until melted it.  Glossy, no?  Grate in your nutmeg and stir.  Set aside.  Try not to eat the whole batch.  But definitely eat some!  You could stop here and have a comforting and delicious dessert to eat alone, or serve company in some fancy glasses with a ginger snap on the side.
Eggnog Custard

Assembly
Make your espresso soak first.  Combine water, rum (or liquor of your choice), sugar, and espresso powder in a container that is easy to pour stuff out of.  Whisk until sugar dissolves.  In the serving bowl you'll be using to present your lovely dish (I used a large clear bowl so folks could see my luscious layers), line the bottom of the dish with some chunks of angel food cake.  We're talking a layer maybe an inch thick of cake on the bottom.  Drizzle half your espresso soak over the cake so it soaks it up.  It's okay if it's not even steven.  Those juices will sink in and redistribute.  Spread half your eggnog custard over the now very brown cake layer.  Sprinkle 1/3 of your crushed cookies over custard layer.  Repeat: cake, espresso soak, custard, cookies.  Time to make the whipped cream.  (Most fun step?)
Whipped Cream Topping
In a cold, clean bowl, use a hand mixer or stand mixer to whip the whole pint of whipping cream into soft peaks.  Add your liquor, vanilla, and sugar.  Whip to stiff peaks.  I like to use my immersion blender with the whisk attachment for making whipped cream.  It literally takes seconds and makes me stand in wonder like a five year old how it magically makes whipped cream happen so fast.  Taste to make sure it's sweet enough for your liking, but don't make it too terribly sweet.  That's part of the elegance of this dessert, is the perfect amount of sweetness complimenting each layer.  Spread the whole lot of it over your layered creation.  Top with the remaining 1/3 of your crushed cookies, and with your handful of crushed or slivered almonds if you choose to use them.  Let this sit overnight or at least for several hours while the flavors marry and the custard soaks and sets the dessert.  Scoop or slice and serve.
Once more, just to tempt you to make this baby

About this dessert
I have to take a minute to tell you I am super proud of this one.  I was inspired by a vegan recipe for Pumpkin Tiramisu and thought the seasonal flavor twist was brilliant.  But I wasn't all about combining chocolate with pumpkin for some reason.  When I thought about eggnog and espresso playing off one another with crunchy almonds, I had to make it and find out if this crazy combo would work.  I can't wait to make it again.  Whether you make the custard or go all the way with the Tiramisu, I hope you'll let me know how it turns out.  Merry Christmas in your mouth.

Pin It

Friday, October 29, 2010

Chocolate-Nutella Cupcakes with Dulce de Leche Buttercream. For Real.

So today is the day to celebrate the lovelies in my office who happened to be born in this most festive of months, October.  While I would prefer to celebrate Oktoberfest-style with some deliciously cold-yet-warming brews, I'm at work.  So we'll have cupcakes instead.  Sometimes I take requests because it's nice to make your coworkers happy.  Requests for this month:  Carrot cake with cream cheese frosting, and really chocolately cupcakes with frosting of some sort.
Admission:  While I love carrot cake, and I love cream cheese frosting, carrot cake is one of the most tedious of cakes to make.  I simply hate grating carrots, and I can't buy them grated to my satisfaction.  Solution:  boxed cake mix and store-bought frosting.  Don't hate.  I did add some personal touches by coloring the frosting orange and piping it!  Plus I got to use my extra-neato cow sprinkles.   Do I recommend these?  Not in good conscience due to artificial ingredients.  But definitely taste one of the other variety...

We're talking deep chocolately cupcakes filled with Nutella, and frosted with Dulce de Leche buttercream. 
I started out with a fairly simple chocolate cupcake recipe from Joy of Baking.com. 
I hadn't ever made a chocolate cupcake using this method (basically making my own chocolate syrup minus the sugar) before, and it was kind of fun.  While the chocolate frosting that goes with this recipe looks amazing, I had to go with something a little more warm and autumn-like to cut the intensity of the chocolate cupcake.  Here's where my favorite blog comes in:  Joy the Baker.  (Not related to Joy of Baking, actually).  This girl is amazing.  She makes things I have wanted all my life but never knew about.  Plus, she is hilarious, and Joy if you're reading right now, which most assuredly you are not, let's be best friends forever.  I found this frosting recipe on her site, which I think she actually borrowed from The Pastry Queen.  Dulce de Leche is caramel usually made from goat's milk.  It's actually available in the ethnic foods section of most grocery stores and is fairly inexpensive.  I probably should have cut this recipe in half since I only made 12 cupcakes and had a lot left over.  If you have leftover batter after a dozen cupcakes, you may want to pile it in a ramekin and bake it with the rest for a delicious molten lava cake for the chef.  I was pretty happy with it.

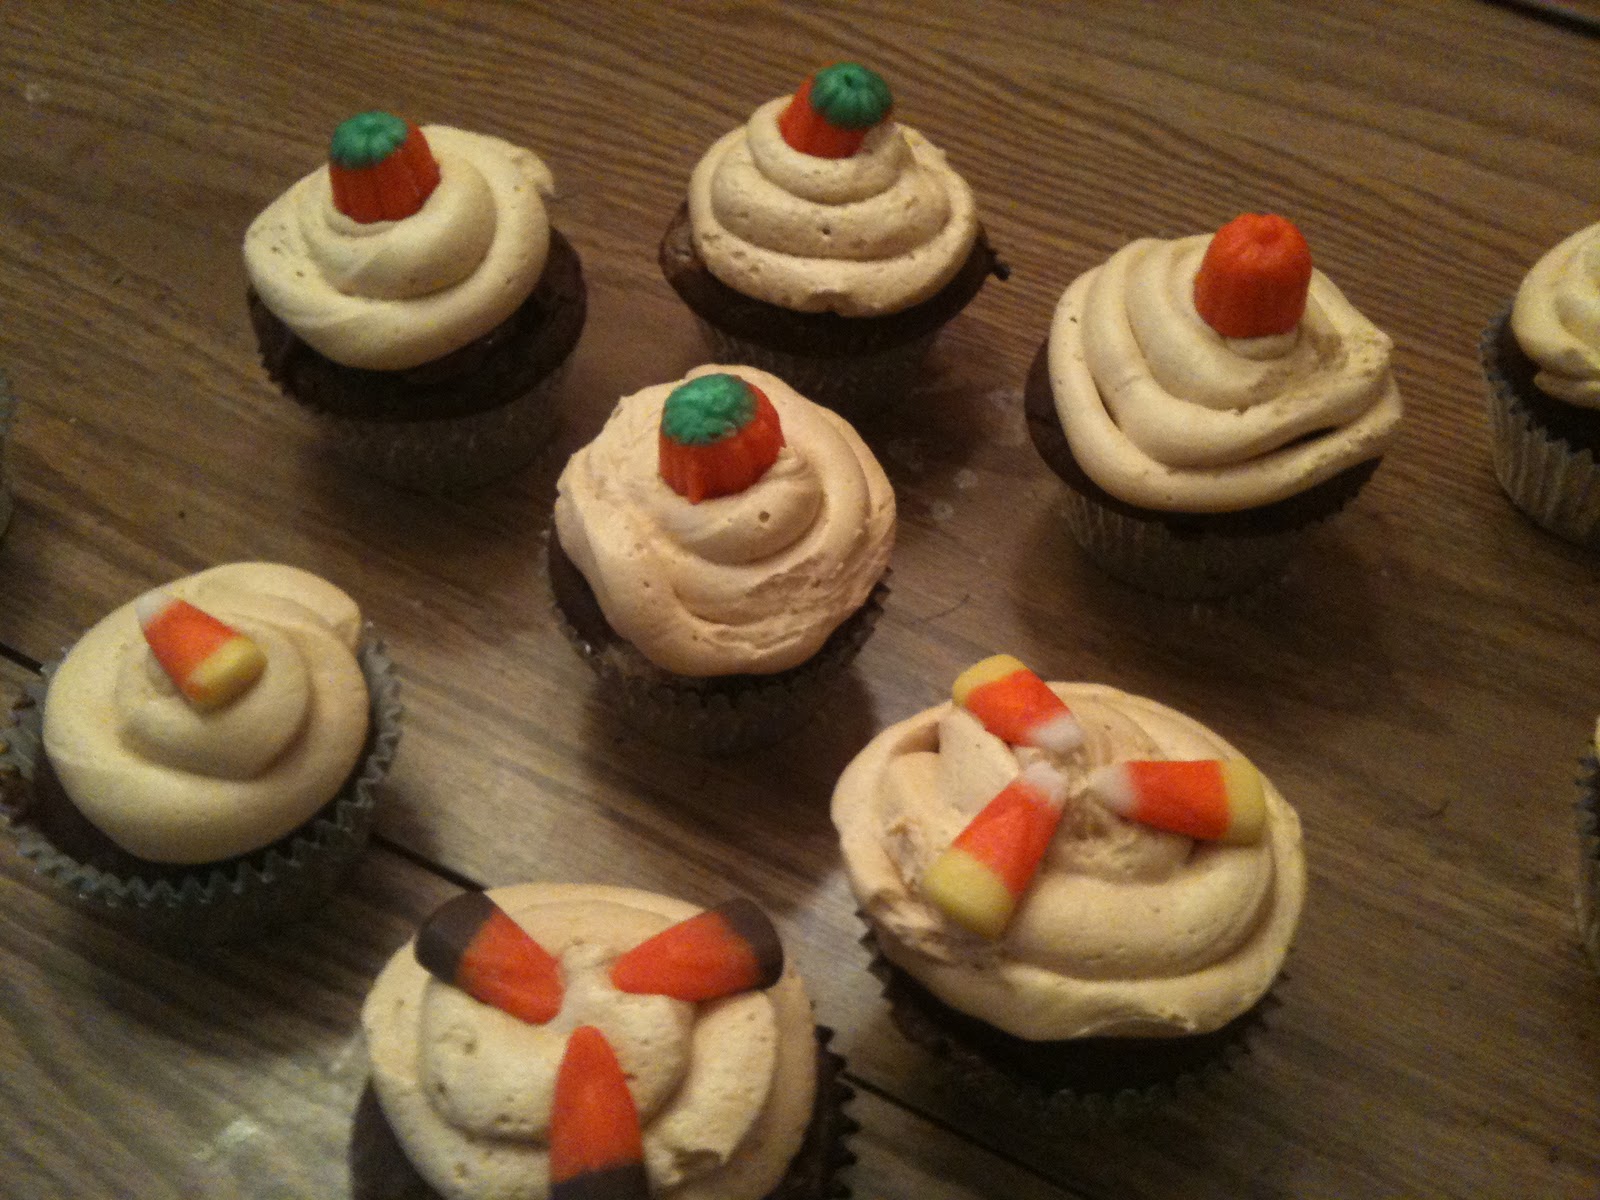
The cupcakes are not as sweet as some (which I love), and the frosting is really sweet, so it strikes a nice balance.  I still had to mess with it.  I had visions of grandeur that involved piping a little suprise well of Nutella into the center of each cupcake before frosting them.  Those visions came to a disappointing end quickly.  (Picture me clutching pastry bag feverishly with chocolate all the way up my forearms, and aforementioned pastry bag exploding into giant supernova of chocolate and brokenness.)  Solution:  use butterknife to spread a thin layer of Nutella on the tops before frosting.  In the absence of a functioning pastry bag, a little Ziploc baggie with a snipped corner served just fine.  I couldn't resist decorating them seasonally with those disgusting little candy corns and somehow-delicious pumpkins made of the same stuff.  *These are not part of a healthy diet.
...And I'm spent.  Happy Friday!

Pin It