Showing posts with label basics. Show all posts

Thursday, December 29, 2011

Easy Southwest Casserole

Oh, Christmas?  Yeah, about that... I'm over it.  I was absolutely sick the whole time.  From Christmas Eve Eve straight up through my stuffed up face this morning.  While I absolutely adored spending time with family and friends, I am ready for a new year.

Yesterday was a weird day.  Second day back at work, the least sick I had been in several days, it started off fine.  Lunchtime.  Enter moodiness, indecision and a strong craving for Mexican food.  I got in my car for my lunch break and began aimlessly driving around town until I landed very close to my house at one of the best Mexican places around: La Vaquita II.  I ate this:


All of it.  Enchiladas Poblanas en Mole- one chicken, one cheese, and some raw onions to foul my breath up for the rest of the day.  It was amazeballs.  Picture this moment: stuffy nosed loner redhead sitting with her back to the rest of the happily chatting Spanish speakers eating in the restaurant, scarfing down a full plate while the fluorescent bulbs highlight my loner status as I stuff my face in front of the huge storefront window.    Sexy.

The thing about Mexican food, is I can never get enough.  Ever.  So naturally, it's what's for dinner.  Casserole is what happens when I think I don't have any groceries and I want to get rid of random leftovers.   It's also so easy that I barely had to pay dinner any attention so I could watch copious amounts of Deadliest Catch get some cleaning done.  You can vary the ingredients with whatever you have in your fridge.  Salsa was on sale for $0.74 last time I went to the grocery store, so this made for a super cheap meal.  If you have a few more ingredients a a couple more minutes, you can make this casserole that has a little more kick.  I am posting the recipe exactly as I made it, but please use whatever you have and don't make a special trip for these ingredients.  For crying out loud, I topped a casserole containing pork with vegan "cheese".  Totally delicious.


Easy Southwest Casserole
1 cup jasmine rice
2 cups water
generous pinch kosher salt
1 1/2 small jars medium salsa (you can sub canned tomatoes with green chilies in a pinch)
1/2 pound grilled pork tenderloin (or cooked meat of your choice/omit meat to make vegan)
1 can black beans, drained
3 good glugs Mexican hot sauce (I use Valentina or Cholula)
1 Tbsp garlic seasoning
1 cup vegan "cheese shreds" (or organic cheese)
Fat free greek yogurt and cilantro for serving

Preheat oven to 350.  Cook rice:  Bring rice and water to a boil. Add salt, reduce heat to low, and cover for 15 minutes.  
Dump one whole jar of salsa in with the rice.  Dump in can of beans.  Dice up your meat.  Dump it.  Stir.
Season to taste with garlic seasoning and fresh ground pepper if desired.  Glug in some hot sauce.  Glug, glug.  Isn't that such a satisfying sound?  Mmm hmm.
Spread your mixture in an even layer into a casserole dish.  Sprinkle "cheese" shreds over the top evenly.  If you have tortilla chips, by all means crush them over the top of the cheese.  Dollop your remaining salsa over the whole mess and pop it in the oven uncovered for 30 minutes, or until the cheese is bubbly and the casserole is heated through.  Serve topped with fat free greek yogurt (or sour cream) and torn fresh cilantro.   Go back for seconds.


Best when enjoyed in the company of someone you love and not under fluorescent lighting.

Ideas for variations- add or substitute the following:
Chorizo
Chopped grilled chicken
Tortilla chips
Pinto beans
canned black olives
canned or fresh jalapenos
Veg-all or mixture of frozen veggies/veggies in danger of dying an ugly death in your fridge
Chives or green onions
Salsa Verde

Monday, December 5, 2011

Sweet Potato Fries and Scenes from the Weekend

O Christmas tree, O Christmas Tree, how sappy are your branches!  So maybe that's not how that sweet li'l anthem goes, but it's certainly how Christmas tree decorating goes for me.
This is largely due to the fact that Jeremy is what some might call fanatical about Christmas light placement, distribution and saturation.  As long as the lights are being put on when he is ready to do it, that's really his problem.  Well call me whiny, demanding, or whatever you want, but I wanted the lights on NOW.  So after he'd spent a good hour putting lights on the top 1/8th of the tree, but took a break to light the grill, I picked up the slack.
And so it begins...

"You have to do it just right.  Wrapping each individual branch up and back to the core, moving to the left, from front to back."  These were my instructions.  Let's cut to 15 minutes later.  Jeremy is grilling, I am sweating, covered up to my elbows in tree sap, and have what I presume is a very fowl look plastered across my face.  Cheerful Christmas music is tinkling in the background and all of a sudden, I hear myself exclaim at the top of my lungs, a very ugly and decidedly un-Christmas-y word.  I get down off the chair on which I am standing, turn off the Christmas music and curl into a ball on the couch, glass of wine in hand, and frown firmly on face.  Consider this my public confession that I was being a total whiny baby.  After Jeremy came back inside, saw me on the couch and had a good laugh, he explained to me that I could do the Christmas lights my way and he was sure they would be just beautiful.  Well the top 1/4th of our tree is just that.  Beautiful.  As for the rest of the house, Christmas exploded all over it.  Boxes, bags, tissue paper and glitter make for a nice little Christmas sheen all over the floor.

On to more successful endeavors...
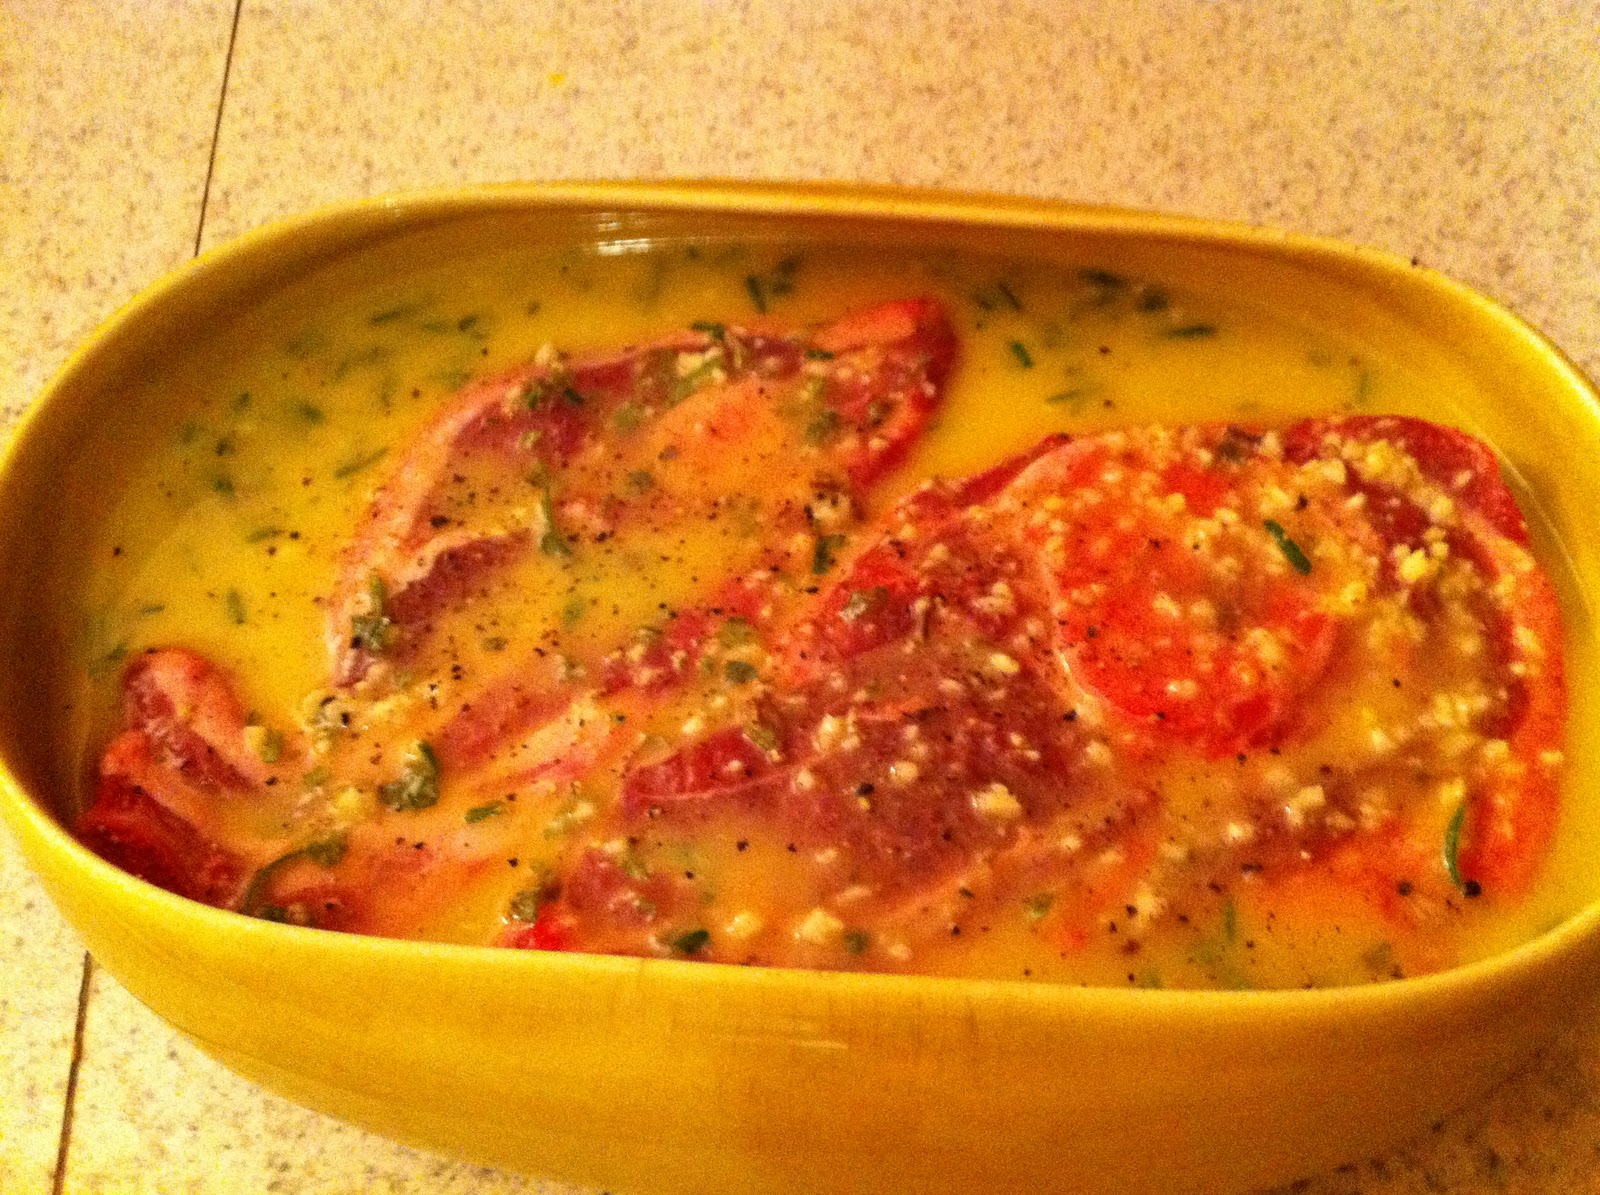
Like dinner.  I found some beautiful lamb shoulder chops at Whole Foods and marinated them in some citrus juices, olive oil, fresh garlic, rosemary, and oregano.

Jeremy grilled those babies up while I made some Garlicky Kale and sweet potato fries.


You can make these too.  It's a cinch.  These are my favorite side to make in the summer with some homemade grilled burgers with all the trimmings.  I like mine savory with a good organic ketchup, but cinnamon sugar works great if your into sweet sweet potato fries, sweetie.

Sweet Potato Fries
1 large sweet potato
1 to 2 Tbsp extra virgin olive oil (if you're making a sweet version, you might try coconut oil instead)
1 Tbsp rib rub or cajun seasoning
Salt and pepper to taste

Preheat oven to 400 degrees.  Peel sweet potato, cut in half lengthwise, and cut each half into fry shapes.  The thinner you cut them, the crispier they'll get, so you want to cut them thin, but not paper thin.  Try to cut them about the same size so they'll cook evenly.  Toss them in the olive oil to coat.  Sprinkle with the seasonings of your choice.  Add salt and pepper to taste.  (This doesn't mean taste the raw potatoes...)
Cook 20 minutes on one side.  Take them out and flip them over.  Cook 15 to 20 minutes more on the other side, or until fries are crisp and browned to your liking.  Sweet potatoes are incredibly healthy, and this will definitely quench any french fry craving you have, so could this be the perfect food?  You tell me.


Pin It

Thursday, November 17, 2011

Technique: Cooking with Dried Chilies

I'm going to let you in on a secret-
Rarely do I ever make the same thing the same way, and I almost NEVER cook soup with an idea of what kind of soup I want it to be.  It just keeps life more interesting, and helps me take advantage of whatever I might have in my fridge or pantry at the time without sending me to the store again.  Another little secret is that I go to the grocery store probably 3 or 4 times a week.  I adore grocery shopping.  The inspiration from the soup I made last night came from two things: the giant pig bone I had sitting in my fridge, and the nice little dried ancho chilies I picked up yesterday at Food Dog.  If you've never cooked with dried chilies, it's a damn shame.  Let's fix that right now.  Not only is it super cheap and easy, it adds depth of flavor like nobody's business and will totally impress your friends.


The good news is you can find these spicy little numbers almost anywhere.  Check either your produce department or the ethnic foods isle.  They can be purchased loose or in bags with several in them.  Ancho chile is my favorite because it has this smoky, sweet, almost raisin like flavor to it.  There are many types: pasilla, chile de arbol, cascabel, and more- you should definitely explore.  One of the best ways to cook with dried chilies is to make your very own chili powder.  How impressive does that sound?!  Guess what... it's easier than putting pants on.  Almost.  Basically, you just grab an assorted handful of  chiles with their seeds removed and toss them in a cast iron skillet with some cumin, paprika, what-have-you, and toast them up a few minutes so they are fragrant before tossing them in the blender.  My dad is a pro at this and used to toast them up in the oven.  This will make your house smell incredible.  Check out Alton Brown's easy and fail proof recipe for specifics.

Want something even easier to do with them?  Use them in a soup or sauce for flavor so authentic your burps will probably sound like mariachi music.  Cut the top off one or two peppers and slit that mother open.  Scrape out all the seeds (most will fall out on their own) and remove  the "veins" (lighter colored stringy fibers on the inside of the pepper).  Mine barely had any visible veins, so I didn't worry much with it.  Put them in a medium container and cover with hot, but not boiling, water.  Cover bowl with plastic wrap and let sit for 15 minutes.   Remove plastic wrap and drain if you're looking to make a paste, or if you're making a soup, you can leave the liquid in there.  Even if you want a paste, save that drained liquid to cook beans, rice, or whatever in it.  Yum!  If you drained them, use a blender (I like my magic bullet for this) to puree them.  If you're making a soup like I did, you want this yummy liquid to stay where it is.  Put peppers and liquid in a blender and puree, or use an immersion blender in that same container to make it super easy.  I ran my puree through a strainer before I put it in my soup.  Totally optional.  After the chiles were in the water with the pork bone I boiled the heck out of, it was clear from my pantry that tortilla soup was in order.  Here's what I did:

1.  Cover bone with water and boil the crap out of it for several hours.
2.  Remove bone and let it cool.  Pick meat off of it and toss it back in the pot with the water.
3.  Rehydrate one dried chile (ancho is what I used) and puree it in its soaking water.  Strain and add to pot.
4.  Chop one onion roughly.  You guessed it, into the pot.
5.  There's corn kernels in the freezer.  Shake about a cup into the pot.
6.  Dump one can of beans into the pot (I used the white ones because I am burnt out on black beans).
7.  Dump can of fire roasted tomatoes in pot.  Add two Tbsp garlic powder, and one of oregano to pot.
8.  Add two chopped up links of chorizo style meatless sausages.
9.  Add 1/3 cup jarred enchilada sauce.
10.  Add the almost used up whole grain tortilla chips in the back of the cabinet after crushing them.

Let this simmer for at least an hour, stirring frequently and skimming fat off the top.  When almost ready to serve, heat 1/3 cup vegetable oil in cast iron skillet until a bead of water flicked into it makes it hiss and dance like nuts.  Fry one tortilla per lucky person eating this, one at a time.  About thirty seconds on each side is good before removing to a plate lined with a paper towel.  Break up into chips for garnish and add to individual bowls of finished soup.  Top with avocado if you have it.  I had mango salsa and cilantro, so there you go.
Tortilla soup for the soul.

This is the first time I have ever made tortilla soup, and it was my favorite.  I will definitely be adding this to my favorite dishes I keep in circulation.
Leaving for MasterChef casting calls in the morning!  I couldn't be more excited, and I can't even express how grateful I am for all the encouragement I've gotten from you guys, family and friends.  Thanks for routing for me!

Pin It


Monday, November 14, 2011

Mango Habanero Salsa

I have something up my sleeve.  Thankfully, it's not a habanero.  But this awesome mango habanero salsa is part of it!  Stay tuned for the big reveal next Monday.  In the meantime, I'll tease you with a few hints.

Have you noticed a trend here?  You may have gathered that I enjoy Mexican food.  A LOT.  If you live in California (you lucky dog), you probably have access to some pretty darn tasty authentic Mexican.  If you live in Durham, NC, you can find some authentic Mexican food, but for the most part it's limited to food trucks, carnicerias (meat markets) and little hole in the wall spots that are pretty amazing if you can dedicate some time to making an adventure out of finding one.  And I hate to break it to you, but for the most part, you are not going to find truly authentic Mexican food (which can actually be quite healthy) at that Torrero's or Bandido's Mexican Restaurant downtown. 

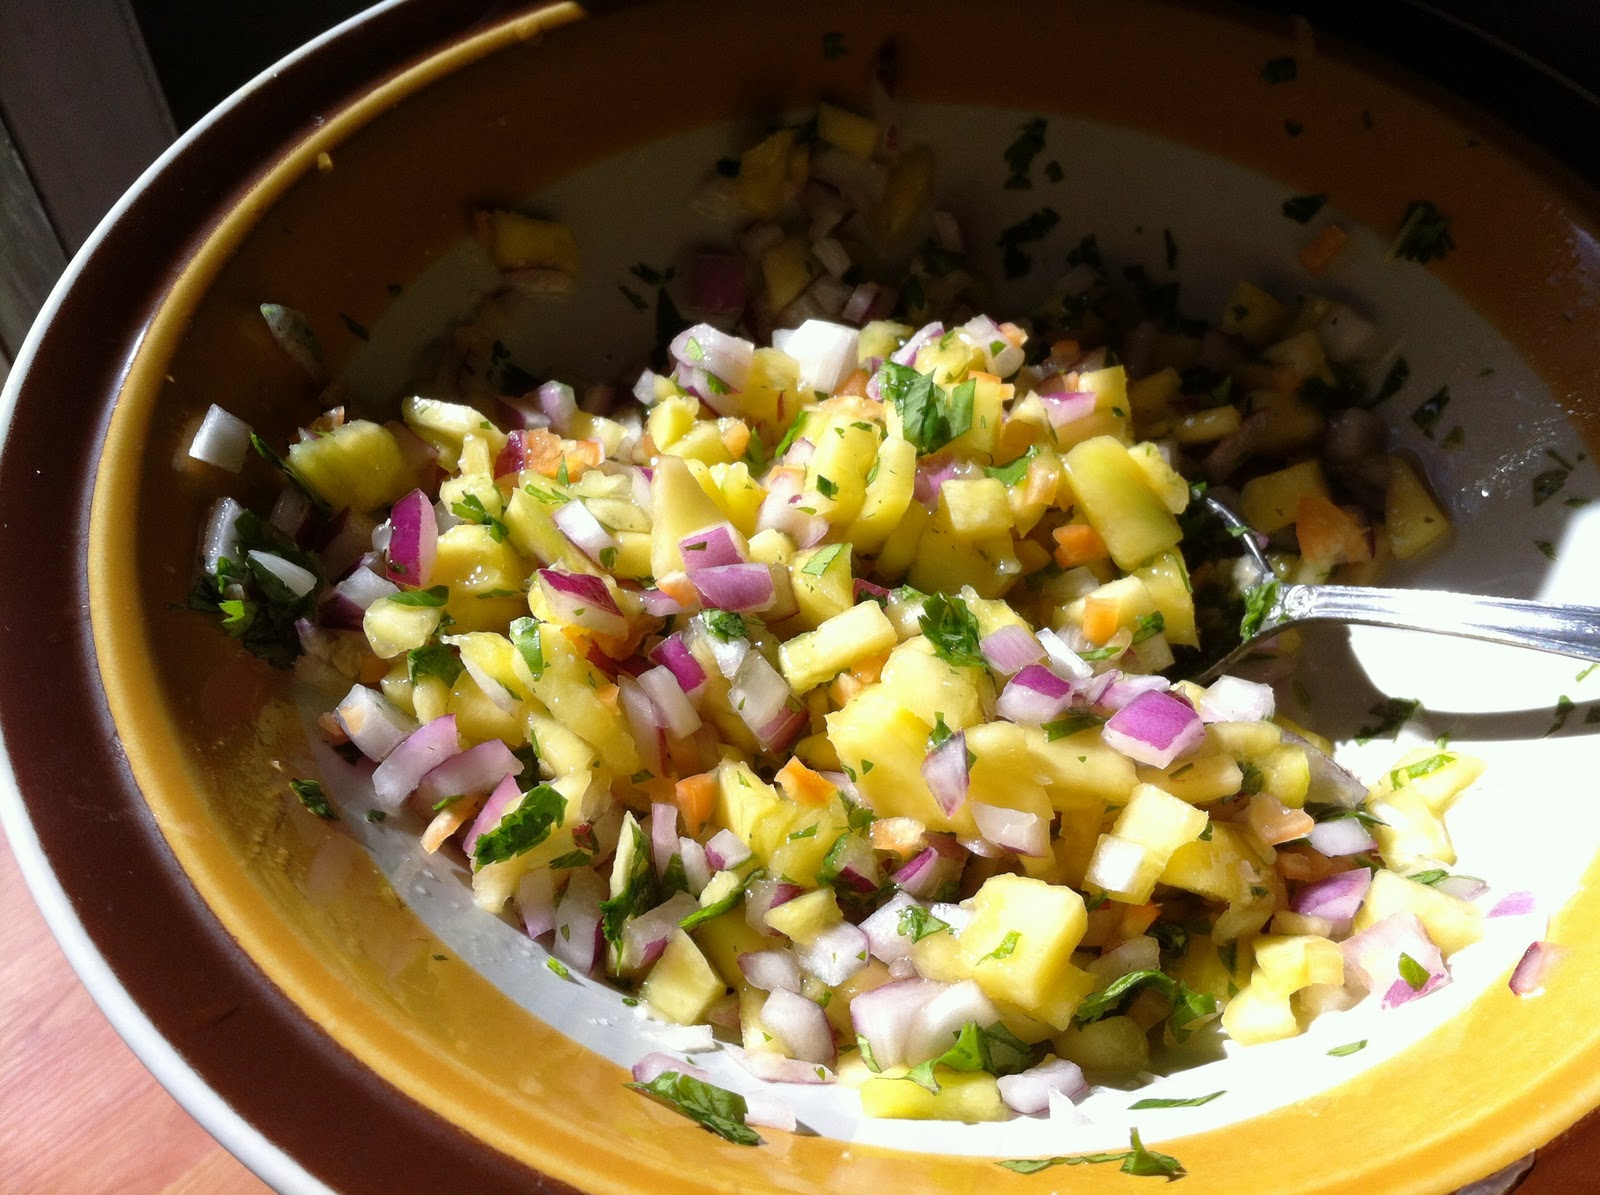
One of the reasons I think Mexican food is so much fun is the crazy beautiful array of colors!  Check out this confetti-lookin' beauty:
Mango Habanero Salsa Fresca
Confession time:  I only used one habanero because I was a scared little baby.  You should use two.  I will certainly use two in my next batch, which I am making this very night.  Two batches in two days because I loved it just that much!  If you are feeding more than just a couple people, you might consider making a double batch.  Trust me, you will have no problem figuring out things to put it on.

Ingredients
1 mango, cut into a small dice
Juice of two limes
Pinch of sea salt
Small red onion, cut into a small dice
2 habanero peppers
2 handfuls fresh cilantro, chopped

First, you're going to want to deal with your mango.  If you've ever dealt with one, then you know the deal.  If not, let me give you a pointer or two.  Mangoes are not a straightforward fruit.  They are tricky and slippery little devils.  Peel your fruit for starters.  It should look like so-
Are you singing the "Rango" theme song while substituting the word "mango" for "Rango"?  Because you totally should.  It made my salsa better, and it can do the same for yours.  Try it- 
"Mang-o! Mang-OOO!"
Now you're ready for the tricky part.  Mangoes don't have a "pit," per se.  At least not in the way a peach or avocado does.  They just get really dense and fibrous and hard to cut in the middle.  This means you aren't going to get all the fruit off of it that you feel entitled to, and that's okay.  Know that it's frustrating for the rest of the world as well.  Just cut off what you can from the outsides, first in large slabs, then in smaller pieces as you get closer to the center.  Get what you can from it, then give the middle to some cool kid or messy adult to chew and suck on.  If they're feeling all Mexican about it, they'll squeeze some lime juice on it and dust it with chili powder because that's what all the cool kids do.  Dice your fruit and proceed to the next step.

Get out your latex gloves for some habanero handling.  No, I'm not joking.  If you do this with your bare hands because you think you have something to prove, then your proof of idiocy will be your burning hands that feel like you stuck them in to an unquenchable fiery furnace.  Enjoy that for the next several hours.

Cut the tops off those bad boys and strip them of their seeds, membranes and dignity.  If you like things a little spicier, feel free to leave some of the membrane in.  

Not only is the habanero one of the hottest peppers in the world, I feel it is also the cruelest.  Why?  Because it tastes so stinkin' fruity and delicious that you want to eat more of it, but you will be punished accordingly.  Give your charming and hateful pepper the fine dice treatment and toss it in a bowl with your diced mangoes.  Add your chopped red onion, cilantro and lime juice.  Add salt to taste.  Taste a couple times and be sure to add your salt a little at a time.  Like toothpaste, you can always add more, but you can't take it back.  You can eat this immediately, but it's going to be even more amazing after sitting in the fridge for a bit to let the flavors get to know one another.

Now, I highly recommend you do this with your salsa:

Toast one corn tortilla on a cast iron pan on your stove top or char it a little over a gas burner.
Mash half an avocado mixed with a squeeze of lime juice, a dash of hot sauce and salt with a fork.  
Top tortilla with avocado mash and a generous heap of your salsa.
Eat this standing up because there's no time to sit when it's this good and this fresh!

Pin It

Tuesday, November 1, 2011

Pesto Change-O!

Oh, now I remember why I don't watch horror movies!  Because they make me cry like a pathetic little scared baby.  In honor of Halloween, Jeremy and I decided to watch Season of the Witch while eating dinner and answering the door.  (Once, by the way.  We had only one group of trick or treaters.  Sad panda.)  It had Nick Cage in it- how bad could it be?  Pretty bad.  Like "release the demons and watch the plague eat peoples faces and turn them into zombies" bad.  Mmmm.  Hungry now?

Let's talk about pesto.  Our favorite pizza ever is the Cosmic Karma pizza at Mellow Mushroom.  It's this totally delicious swirl of regular pizza sauce and pesto sauce as the base, with toppings of fresh tomato, feta, and sun dried tomatoes that turn it into melty pizza bliss.  I can make pesto!  And you can too:

Ingredients
2 cups fresh basil
1/2 cup chopped parsley
2 large cloves garlic
1/2 cup extra virgin olive oil
1/2 tsp black pepper
2 tsp fresh lemon zest
3/4 cup raw walnuts or pine nuts (walnuts are cheaper, my friend)
1 tsp kosher salt

Blend all ingredients together until smooth.  Some people like it chunkier, and that's fine.  If you are into eating dairy, by all means dump at least 1/3 cup of parmesan cheese (use the good stuff, like parmigiano reggiano) into the mix.  This will make it thicker, so add more olive oil as desired.  Use as a topping for pizza, on fresh bread, mixed with pasta (or zucchini spaghetti) or mixed in with some ricotta and used in lasagna or eaten right of the dang spoon.  I chose to paint with mine.  Behold the artistry:


Finger painting for adults!  Wouldn't it be so festive if I smeared some on my face before answering the door for Trick or Treaters?  "Happy Halloween kiddos, from Swamp Thing's home to yers."  Oops, I just lost a reader.  Back to pizza construction.

I made swirls of my homemade pesto and jarred Roasted Red Pepper Tomato Sauce from Whole Foods (because it's Halloween and I'm not trying to be Martha Stewart tonight) onto my homemade pizza crust.  I made an easy spelt flour/regular flour crust that was okay but not my favorite, so I won't post the recipe this time.  But you could totally make it so much easier on yourself and use a premade refrigerated crust.  Please do yourself a favor and don't use one in a can.  I have never been to a pizza place that wouldn't sell me a ball of their unbaked dough for super cheap.  Definitely work up the courage to be a weirdo and do this.  Trader Joe's, Whole Foods, and many supermarkets also carry freshly made refrigerated or frozen pizza dough that is convenient, cheap and ready to go.  After you've painted your sauce(s) onto your blank canvas, it's time to start decorating.


Ours was festively decorated with thinly sliced onions and fresh red peppers, olives, capers, sun dried tomatoes, and local fresh goat cheese with herbs.  Jeremy's side had Cabot Seriously Sharp White Cheddar, and mine had the tablespoon I had left of my Daiya shredded vegan "cheddar" which I would totally recommend in a heartbeat.  I decided to let a few goat cheese crumbles mingle on my side since I am not trying to be a nazi about the whole no dairy thing.  Ten minutes at 425 degrees and dinner is ready and handheld.  Win!


We made short work of this pizza and totally demolished it.  I gave mine a generous sprinkling of nutritional yeast and it was so good Jeremy actually put "that weird stuff on the counter" on his seconds!  Why don't I make pizza more often?  Happy November!

Pin It

Monday, January 18, 2010

Back to Basics and Canstruction

There are a few things I simply refuse to buy because they are so much better and cheaper made myself in almost no time.  I don't buy any sort of pre-peeled or pre-minced garlic.  Not only does this exposure to air and jarring process make the garlic not taste as good, but then I would miss out on the garlic smell on my hands which I admittedly LOVE, even after the meal is finished.  It lingers like such a sweet memory.
I will not buy salad dressing.  You would be amazed at the amazing flavors you can concoct in just minutes with the most basic and cheap ingredients.  (My favorite of late is a curry mustard vinaigrette, but I digress...)
I will not buy pasta sauce.  Let me expound on this a bit, if I may.

I never ever ever (except for by accident on very rare occasions!) let myself run out of fresh onions, fresh garlic, and canned tomatoes of some sort.  With these three staples, you will never be sauceless.  How long does it take to make, you ask?  Barely a flash.  Here's how:

In a heavy bottomed saucepan on medium heat, pour in enough olive oil to just coat the bottom.  (I usually use about 2 teaspoons).  Finely mince or crush several cloves of garlic, depending on how strong you like your garlic flavor.  I LOVE GARLIC, so I usually use 3 large or 4 medium cloves and I like to mince them very finely since the smaller the mince, the stronger the flavor.  (More surface area if you're a geek like me that likes to know why).  Try not to let the garlic brown too much, as this will make it bitter.  The trick is to constantly stir it around.  Add in crushed red pepper flakes to taste almost immediately.  You're ready to pour in a large can (15oz) of tomatoes as soon as you smell the heat from the red pepper.  If you are doing this, you'll definitely know what I mean.  It tingles.  Once you've dumped them in, turn your sauce down to medium-low heat and give it a good stir.  If you used whole canned tomatoes, now is the time to smash them.  If you used crushed, diced, or pureed, you can just walk away. 

Let the sauce come up to a simmer and add in any herbs you wish.  Italian seasoning, basil, oregano, savory, a bay leaf, etc.  I like to use Italian seasoning, one bay leaf, and a little extra basil. I usually use tomatoes with salt already added, so I don't add any additional salt.  You're sauce is ready when you're happy with the seasoning.  Use it as a pizza sauce or a pasta sauce.  Dilute it with chicken stock for a great minestrone soup base.  Try it, and let me know if I've converted you into an ex-commercial-pasta-sauce-consumer.

In other news:
Here I am in the news:
     
The News and Observer, that is.  Every year our office (Duda/Paine Architects), competes in Canstruction, a themed contest benefitting the Food Bank of North Carolina.  This year's theme was super heroes.  Naturally, we chose to construct an eight foot Super Smurf (complete with cape) from 6,500 cans of Kroger Chunk Light Tuna.  Suffice it to say, we rocked it. 

Check us out killing it time lapse camera-style on YouTube:
Duda/Paine Smurf Squad Extreme

Thanks for checking it out!

-The Redhead in the Kitchen