Friday, October 29, 2010

Chocolate-Nutella Cupcakes with Dulce de Leche Buttercream. For Real.

So today is the day to celebrate the lovelies in my office who happened to be born in this most festive of months, October.  While I would prefer to celebrate Oktoberfest-style with some deliciously cold-yet-warming brews, I'm at work.  So we'll have cupcakes instead.  Sometimes I take requests because it's nice to make your coworkers happy.  Requests for this month:  Carrot cake with cream cheese frosting, and really chocolately cupcakes with frosting of some sort.
Admission:  While I love carrot cake, and I love cream cheese frosting, carrot cake is one of the most tedious of cakes to make.  I simply hate grating carrots, and I can't buy them grated to my satisfaction.  Solution:  boxed cake mix and store-bought frosting.  Don't hate.  I did add some personal touches by coloring the frosting orange and piping it!  Plus I got to use my extra-neato cow sprinkles.   Do I recommend these?  Not in good conscience due to artificial ingredients.  But definitely taste one of the other variety...

We're talking deep chocolately cupcakes filled with Nutella, and frosted with Dulce de Leche buttercream. 
I started out with a fairly simple chocolate cupcake recipe from Joy of Baking.com
I hadn't ever made a chocolate cupcake using this method (basically making my own chocolate syrup minus the sugar) before, and it was kind of fun.  While the chocolate frosting that goes with this recipe looks amazing, I had to go with something a little more warm and autumn-like to cut the intensity of the chocolate cupcake.  Here's where my favorite blog comes in:  Joy the Baker.  (Not related to Joy of Baking, actually).  This girl is amazing.  She makes things I have wanted all my life but never knew about.  Plus, she is hilarious, and Joy if you're reading right now, which most assuredly you are not, let's be best friends forever.  I found this frosting recipe on her site, which I think she actually borrowed from The Pastry Queen.  Dulce de Leche is caramel usually made from goat's milk.  It's actually available in the ethnic foods section of most grocery stores and is fairly inexpensive.  I probably should have cut this recipe in half since I only made 12 cupcakes and had a lot left over.  If you have leftover batter after a dozen cupcakes, you may want to pile it in a ramekin and bake it with the rest for a delicious molten lava cake for the chef.  I was pretty happy with it.

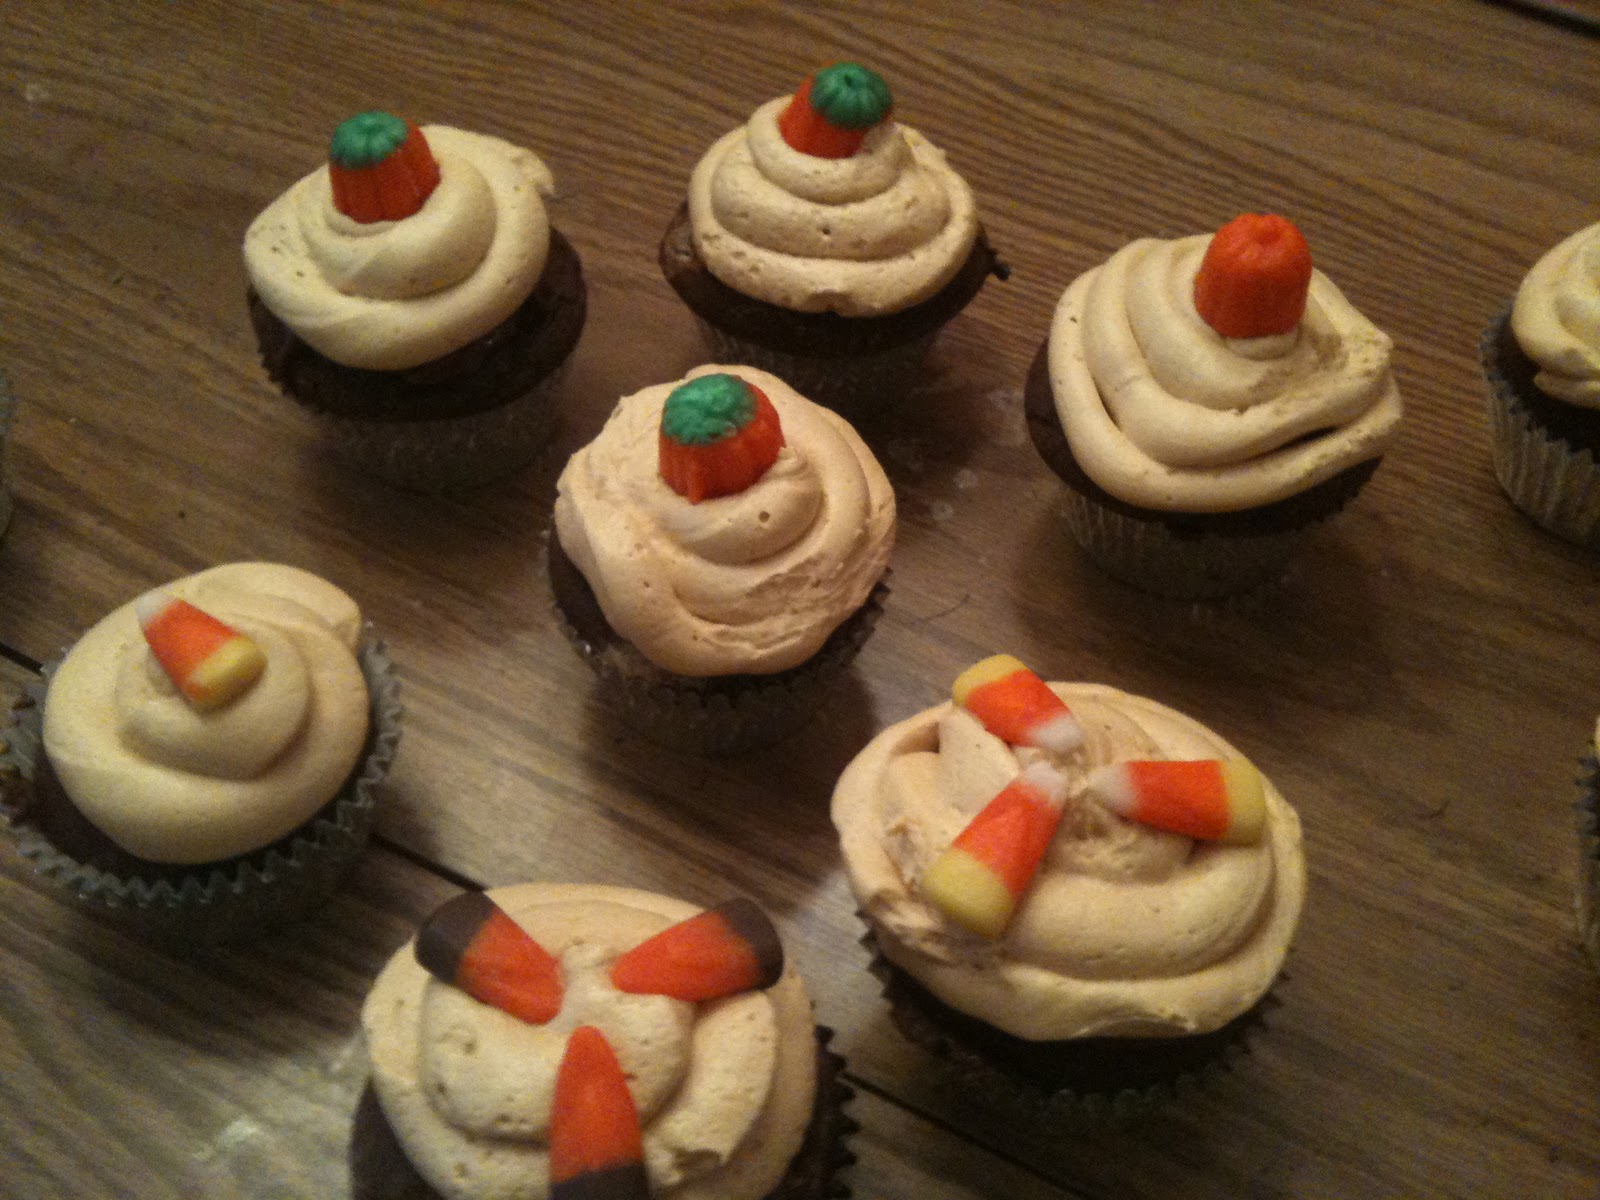
The cupcakes are not as sweet as some (which I love), and the frosting is really sweet, so it strikes a nice balance.  I still had to mess with it.  I had visions of grandeur that involved piping a little suprise well of Nutella into the center of each cupcake before frosting them.  Those visions came to a disappointing end quickly.  (Picture me clutching pastry bag feverishly with chocolate all the way up my forearms, and aforementioned pastry bag exploding into giant supernova of chocolate and brokenness.)  Solution:  use butterknife to spread a thin layer of Nutella on the tops before frosting.  In the absence of a functioning pastry bag, a little Ziploc baggie with a snipped corner served just fine.  I couldn't resist decorating them seasonally with those disgusting little candy corns and somehow-delicious pumpkins made of the same stuff.  *These are not part of a healthy diet.
...And I'm spent.  Happy Friday!

Pin It

Thursday, October 28, 2010

Veal Meatball Stew

Do I feel guilty about buying two pounds of ground veal this week?  Factoring in that this delicious meat in all its splendor only set me back a little over $6... Never!  If you have a particular aversion to eating tender baby cows, you could certainly use a different ground meat.  But let's be real:  veal is amazing.
I wasn't quite sure what its fate would be while purchasing the meat, but inspiration struck on my drive home from work, and I made this recipe up as I went. 

First, I set to work making the meatballs.  You don't need to use 2 lb of meat for your meatballs, but I did, and it made tons.  Believe me, you'll want leftovers. 
I combined my meat with half a cup of finely grated Parmesan Reggiano (it's worth the extra expense on this recipe), half a cup of bread crumbs, half a finely diced onion, 1 large egg, 2 large cloves of minced garlic, 2 Tbsp oregano, and salt and pepper to taste.  Get your hands in there and get squishy.  Mush, mash and mix everything until it's well combined.  Have your elves, Oompa Loompas or children get to work making 1" meatballs while you drag out your big soup pot.

Heat your pot on medium heat and coat the bottom with a thin layer of olive oil.  Carefully place a layer of meatballs in the pot and brown them slightly in batches.  You probably have lots of little loose onion pieces that popped out of your meatballs.  This is not a bad thing, so don't stress.  Hold on to those little morsels.

I got tired of this and quit after doing one layer.  I told you I was making this up as I went, so cut me some slack here.  I drained the excess fat from the pan, and poured in about 1/3 cup of the dry red wine I was drinking at the time to deglaze the pot and scrape up all those delicious brown bits, being careful not to break up the meatballs too much.  Dump in one large can of crushed tomatoes with basil, the rest of your meatballs (browned or not), and a couple canfuls of water or chicken stock if you have it.  Sadly, I have no chicken stock right now, so I used water.  Also go ahead and dump in those rogue onion pieces you saved from earlier.
If you like, feel free to add extras here like some more garlic (never hurts) or vegetables from your freezer.  I dumped in the rest of a bag of tricolor pepper pieces from my freezer.  Turn your mixture down to low heat and walk away, drink some wine, or watch a TV show.

Taste and season your stew at this point with a little salt and pepper if needed.  Not too long before you're ready to eat, stir in fresh baby spinach and a little less than half a pound of pasta.  I used gemelli pasta (which means "twins" because it's like two noodles twisted around eachother).  The longer you let this sit and simmer, the more swollen your noodles get.  Normally I would stop at al dente, but I started feeling bad and had to go lay down on the couch at this point in the recipe.

Turns out this wasn't a bad move for my soup-turned-hearty-stew.  A few ibuprofin and heating pads later, I sat down with my bowl of hearty stew topped with more parmesan cheese and some fresh parsely, and some cheese toast.  Perfect movie watching and blanket cuddling cuisine.
Flash forward one or two days!
Time for some leftover heaven.  Preheat oven to 350 degrees.  Dump your swollen noodle stew into a casserole dish.  Top with shredded cheese if you had it.  (I had about a half cup of  shredded cheddar, so I used that).  Combine 1 Tbsp. melted butter with 1 cup panko bread crumbed, 1 tsp. garlic powder, 2 Tbsp parmesan cheese, and black pepper to taste.  Top casserole with bread crumb mixture and bake uncovered for 30 minutes.  Which is better?  Stew or casserole?  I'm torn!

Peace, Love and Meatballs,

Melody

Pin It

Saturday, October 23, 2010

Spice up your Breakfast, Baby.

This is just something I make.  Is it gorgeous?  No.  Fancy?  No.  It is easy, quick, scrumptious and satisfying.  A good way to start out this gorgeous day.  I like to call it a breakfast chalupa.
A great friend of mine is getting married today, and I am so excited for her and her husband-to-be.  If I plan on dancing my socks off tonight, I better eat hearty this morning.

I made my breakfast chalupa pretty substantial today since I slept in on this Saturday morning, but it would work just as well if not better with a smaller tortilla and just one egg instead of two.  We'll call that a weekday breakfast chalupa.


In a medium or large saute pan, melt a teaspoon or so of butter on medium heat before cracking two large eggs into the pan.  Cook the eggs until the whites turn opaque, then top the eggs with shredded cheese while they are still in the pan.  I used Seriously Sharp White Cheddar by Cabot.  Toss a tortilla on top of this mess and press gently.  Let it sit and cook this way until the whole thing adheres together, about one minute.
Here comes the tricky part.  With the biggest spatula you have, scoot the spatula under this conglomeration, trying the best you can to get it under any cheese or stray egg pieces that may be hiding under your tortilla.

Get ready...

FLIP!  It doesn't matter if it's ugly.  Now top your creation with a bit more cheese if you like, and a generous portion of salsa.  I like a spicier salsa with my eggs.  Sometimes I like just straight up hot sauce, especially if I am making a weekday version of this.  Salsa verde is a great choice with this, as would be a roasted tomato salsa.  But for our purposes this morning, ChiChi's medium salsa is what I had in the fridge.  This is Saturday morning, folks.  We're not fancy.  Let this cook awhile until the cheese between the eggs and tortilla gets all melty.  I don't like to cook mine terribly long because I like the yolks to still be a little runny.  Saucy!

Now you're ready to fold it like an omelet.  If you're lucky, little pieces of cheese or egg or salsa have escaped and smeared themselves onto the outside of your tortilla.  This makes for browned crusty goodness.  This is a good thing.

Let it brown a little (maybe half a minute) before flipping to the other side and doing the same.  Slide that baby out of the pan onto a plate.  If you have some sour cream or greek yogurt, now would be a good time to get that out and add a dollop to the top of this mess with some fresh cilantro.  I don't have either, so I ate mine straight up with black coffee.


Let's get this day started!
Get me my dancing shoes.


Pin It

Thursday, October 21, 2010

Autumn in a Pretty Little Package

This is my favorite time of year.
In the season where everything is dying or preparing to hibernate or go dormant for winter, there is somehow an exciting tinge of hope for renewal in the air.  Something that just stirs my soul about the crispness in the air, the vibrant colors that seem to explode out of nowhere in the trees, the faint smell of burning leaves.
When the nights turn cool again and I start to crave soup constantly, well that's about the time that I become obsessive about "seasonal" dinners and my beloved deep orange Le Creuset dutch oven.  And while my perfect little pot helped me crank out some hearty lamb stew last night, our focus at present is the stuffed acorn squash that sits happily digesting in my belly in its fall festive splendor as I type.  Hungry yet?  Let's get to it.  Here's what you do:

1.  Preheat oven to 400 degrees.
2.  Split an acorn squash (carefully) end to end, scooping out the stringy flesh and seeds in the middle.
3.  Cut a small sliver off the outside skin of each half so it sits level on a surface before seasoning the fleshy side with salt and pepper.  Put half a tablespoon of butter in each half.
4.  Place squash flesh side up in a roasting dish or casserole, and fill the dish with hot water to about halfway up the squash.  Bake in the oven loosely covered with foil for about 40 minutes, or until tender.

Meanwhile
5.  Treat a small to medium onion to a fine dice and saute in 2 T olive oil with some bell peppers (if you have them on hand).  I used frozen tricolor peppers from Trader Joe's.  Also at this time add whatever meat you choose to add (if you want to add meat).  This would be a great meatless dish.  I used chicken olive artichoke sausages, but this would be great with ground beef, lamb, or really any kind of ground meat or sausage.  Cook on medium until vegetables are soft and meat is cooked through.

6.  While your veggie-meat mixture is working, and your squash are still in the oven, cook up some rice, couscous or quinoa.  I am a sucker for those Near East seasoned couscous-in-a-box deals, so I highly recommend those.  High on flavor, low on fuss, cooks in 5 minutes.  I used the parmesan couscous, but if I had the wild mushroom kind, I DEFINITELY would have used that.  (The earthiness would go so nice with this stuff).
7.  Take your squash very carefully out of the oven so you don't scald yourself, for goodness sakes.  Put each half on a plate.
8.  Dump couscous/rice/what have you into the veggie-meat mixture and stir.  I like to throw in a few tablespoons of raisins here.  Toss in some spinach to wilt if you like.  I left out the spinach tonight.
9.  Scoop your stuffing into the hollowed out squash halves, using an ice cream scoop if you really want to be snobby about it.  I like topping mine with herbed goat cheese (because it was in the fridge and almost gone) and some fresh parsley.
10.  Stuff yourself with the stuffed awesomeness.


So that looks like a lot of steps.  (I admittedly might have even listed two steps combined as one step just to see if you're paying attention.)  Look.  It's not a lot of steps, and it's all in all a pretty impressive dinner for minimal effort.  On the table in 40 minutes (with downtime therein!), and depending on what you choose to include or omit, a pretty darn affordable meal.

On a personal note:
Thanks to everyone who encouraged me to continue with the blog.  There is something so wonderful and gratifying about cooking and sharing it with others.  It really means a lot to know there are people willing to endure listening to me pontificate and spew food-talk.  I love you guys, and am happy to be back!

Pin It

Monday, March 1, 2010

Quiche like Manna from Heaven

Has anyone seen that episode of The Office where Kevin goes on and on about his family recipe chili before he proceeds to spill a huge vat of it all over the office floor?  I have felt his pain on a number of occasions.  While the first one looked the messiest, (Sweet Potato Chicken Chili has that musty smell and orange color that provokes terror when coating even the most water resistant floor mats), this morning's spill was much more challenging.
While creme fraiche quiche has a creamy, velvety, intoxicatingly rich flavor and texture after cooking, the custard before cooking smells a little funky as all cultured creams do.  Imagine it:  you've have your custard mixture in your stainless steel bowl all covered snug with plastic wrap and situated just so in the floorboard.  Throughout the commute you check to make sure it's secure and comfortable.   When your workplace is in sight and you are about to turn into the parking lot, you notice a slightly piquant dairy odor.

TERROR OF TERRORS!  Your floorboard is completely white, the bowl is in its original upright position, the plastic wrap is still completely in place, and yet the contents of the bowl are sloshing and seeping into the darkest recesses of your custard colored Camry.  Welcome to my Monday morning.  While I ponder how to remove the custard funk from my vehicle, you enjoy this amazing recipe courtesy of Joy the Baker.  This girl has got it goin' on.  Her recipes are so inspiring, her sense of humor is grand, and she's one of those people you know was just blessed with loads of common sense.
Mine right after it came out of the oven all puffy in its custard glory and puff pastryness:
The glorious thing is that I was able to make cheese straws to go with my soup tonight with the scraps leftover from trimming the edges of the pie crust:
Just trim your scraps into quarter inch thick strips of dough, twist them into a spiral, sprinkle with the cheese of your choice (parmesan or gruyere works great, especially if you have leftover gruyere from making the quiche above), and bake at 400 for 11 minutes.  Like eating cheese flavored buttery air...


Pin It

Tuesday, February 23, 2010

A Yucatecan Adventure Supreme


I've been a woman on a mission.  Couldn't stop thinking about the mole.  I just couldn't leave well enough alone.  So off to the fantastic Food Lion filled with hispanic delights.  (I love Durham.)  On the list: 15 dried pasilla and ancho chiles, copious amounts of onions for pickling, pico de gallo, and general awesome purposes.  Lots of limes for garnish and ingredients, a bunch of cilantro, and some cotija cheese (kind of like Feta, but a smaller crumble).

After a most enjoyable and exciting trip, I got down to business.  While I waited for my chiles to rehydrate in their bowling water so I could turn them from dried raisiny looking things into creamy, smoky, stain-my-hands-ochre-goodness, I made my pickled onions. 

Not so hasty, there Hater.  No need to go hating on all things pickled that are not cucumbers.  I am allowed to say this because I was once like you.  Until I had some nice little hot pink onions on top of my cochinita pibil in Xocen, Mexico.  It was then I began to appreciate the rich contrast of flavors and textures that a pickled condiment can offer.  Now make these:

Combine 1 very thinly sliced large red onion with
1 c. water
1 c. red wine vinegar
1 Tbsp granulated sugar
salt to taste
generous dash hot sauce (Valentina is my favorite, and a very economic option)

Let this mixture sit at least 5 hours.  Overnight would be even better.  These will keep up to two weeks in the fridge.  Use them to top refried beans, tacos, chili, eggs with mole or salsa, or other endless possibilites!  Don't spill them in your car like Jeremy did.  It's not a smell you want lingering in the upholstery.

After that adventure, I was ready to drain my chiles, cook down some onions, tomatoes and raisins, toast some spices, dump everthing in a pot with a little chicken stock and bust out my trusty immersion blender.  I'm not going to post this recipe for two reasons.  1) Laziness:  this recipe calls for a million spices (of which I was astonished I actually had on hand) and is quite involved.  2) Moles of any variety are always full of very strong flavors.  It's not like your typical sauce, and for some including me, it's an acquired taste.  It's homey, comforting, rich and complex, but it's not velveeta.
That being said, if you want to try this mole, I will very happily post or send the recipe if I get the feedback.  While that continued to simmer, I whipped up a batch of pico de gallo, or salsa cruda.  This is a staple.  It is something very useful to learn how to make, yet it is very simple and delicious.  Now make this:

Combine:
5 ripe roma or plum tomatoes, seeded and diced
1 medium spanish or red onion, diced
Juice of two whole limes
large handful of fresh cilantro, chopped
1 large jalapeno, seeded and deveined (or keep the veins in if you like it hot)
Large pinch of salt
black pepper to taste
pinch of sugar (optional)

Mix well and allow the flavors to come together for a couple of hours for optimal results.  Tweak this however you want to make it spicier, or try substituting fruit like mango, pineapple or peaches for the tomatoes.  Even better!

Now it's time to head to Mom and Dad's where the eats are serious and the chicken and pork are coming off the grill.  If you've never had Bob's pork, it's high time you weaseled your way into his circle of friends and get some.  All smoky crunchy on the outside and juicy and tender on the inside.  I decided the mole would be best suited for topping a chicken leg and trying a la carte.  We'll start this party with a large corn tortilla hot of the skillet.  For the inside of my taco, I had to cook up some Mexican chorizo.  It's just too good to pass up when you can find it, and it's so cheap!!  (Don't read the ingredients unless you're particularly brave or adventurous with the parts of animals you ingest.)  To top: a little black beans, some fat free greek yogurt, cilantro, pico de gallo, pickled onions.  BLISS!  So the mole was good, but come on, a taco complete with pickled onions tasting like you're eating it in the jungle of the Yucatan after a hot day in the milpa????  It just doesn't get better than that. 

Tune in next time for what I did with my leftover mole.  Oh, it's good...

Wednesday, February 17, 2010

Casserole Comfort with a Kick!

My good friends Jonna and Jeff just had a baby!  Needless to say, I am over-the-top excited about this recent development named Carolina Grace.  I mean, everything else aside, her name is Carolina, for crying out loud! 

So I have been working for FOREVER on this baby blanket for her, which is the first anything I've ever knitted that is not a scarf.  And by the looks of it, unfortunately, I'm afraid you can tell.  But the important thing is that it was knitted with love.  And hand dyed yarn from the mountains of Chile.


So I managed to snap a picture of this creation, but I failed to snap a picture of the better and more consumable creation I made for her (and me the night before!).  Check out this recipe I created for the dinner I took to Carolina's proud parents.  I find that I lot of my favorite creations come from the creativity that arises from cooking with what you have on hand.  I gotta say, this one is pretty tasty and comforting on a February night.  It's even better if you have leftover chicken already on hand to save you a step.

I hesitate to make posts when I have forgotten to take a picture of my creation, but I had to make an exception with this one because I thought it was pretty fab if I do say so myself.


Southwest Chicken Verde Casserole


For the salsa verde:

In a blender combine-

1 can whole tomatillos

2 large cloves garlic, peeled

1 handful cilantro leaves

Juice of two limes

1 seeded and deveined jalapeno, chopped into large pieces

For the casserole:

1 c. cooked rice

1 can black beans, rinsed and drained

1 c. frozen corn kernels (roasted, if available)

2 medium boneless, skinless chicken breasts, cooked and cubed

1 large onion, diced

1 green pepper, diced

2 Tbsp olive oil

Salt

Pepper

1 ½ c. shredded cheddar cheese

Blue corn tortilla chips, crushed


Make the salsa verde and mix with the first four casserole ingredients. Preheat oven to 350 degrees. In a large saucepan, heat the olive oil on medium heat. Saute the onions and peppers in the olive oil until softened. Add to casserole combination, seasoning with the salt and pepper to taste. Spread mixture evenly into a 9” x 13” greased casserole dish. If you want yours even spicier like I do, sprinkle some Mexican hot sauce like Valentina or El Tapatío over the casserole. Top with crushed tortilla chips in an even layer (about two or three handfuls worth before crushing). Top with shredded cheese. Bake casserole for 20 minutes, or until ingredients are heated through and cheese has melted. Cover with foil to prevent overbrowning if necessary.  Garnish with a dollop of sour cream or greek yogurt, extra hot sauce, and chopped fresh cilantro. 

I ate like half the casserole.  Don't judge me.

Monday, February 15, 2010

What a Weekend!

So this weekend I really strapped on the ol' feed bag as my dad likes to say.  With my mom's birthday on Saturday and Valentines Day on Sunday, there was plenty of indulgence going on.  We get together every year with my mom's side of the family to celebrate the six birthdays that occur in February.  I included a photo of the lovely birthday women (Mom, Aunt Hannah and Maw-Maw), and the stunningly handsome birthday boys (Jeremy, Henry and Hank) for your viewing pleasure.  Thanks in advance to my beautiful cousin Ashley for letting me rip these off your Facebook page.


This year my dad researched where we should go and picked the Green Valley Grill in the O. Henry Hotel in Greensboro.  I have to say, it was spectacular.  I ordered pan seared sea scallops in a blood orange buerre blanc served over a butternut squash gratin with vintage gruyere.  Yes, it was as amazing as it sounds.  Going for lunch instead of dinner was a great choice, as my entree was only $14!  The service was impeccable, and the atmosphere is impressive.  They have an open kitchen where you can watch ducks, chickens, and pork loins rotate over the oak burning oven.  I really lament that I did not take a photo of my meal, as the presentation was terrific.  I guess I just couldn't stand the pain of not diving right in!

For Valentines Day, Jeremy presented me with the most gorgeous bouquet of two dozen longstemmed red roses and really pulled out all the stops.  We went to Whole Foods where I got to pick out all kinds of deluxe items.  After cooking dinner together, we relaxed with some red wine and watched The Time Traveler's Wife.  Check out these amazing ribeyes!

Each one got treated to a rubdown with a thinly sliced clove of garlic, extra virgin olive oil, course ground black pepper, hawaiian pink salt, and some chopped fresh rosemary before Jeremy grilled them to medium rare perfection.  Confession: my favorite part of having steak for dinner is waiting until I am alone in the kitchen with the plate of cooked and cut meat, tipping the plate full of juices up and slurping it down.  Please tell me I am not alone in this probably repulsive desire.  Regardless, it's heavenly.


For our side, I braised some swiss chard with caramelized onions.  I had done this before with rainbow chard, but this was wayyy better for whatever reason.  I will allow that butter might have been that reason.  Try this:

Get your saute pan going on medium heat.  Add one tablespoon of butter and one tablespoon olive oil.  Toss in one very thinly sliced onion (I used a Spanish onion).  Separate the rings, and then walk a way a minute or two to give it a chance to get those sugars hot.  Add another tablespoon of butter. Continue to cook on medium heat until the onions are golden brown.  Reduce heat to low while you coursely chop up one bunch of swiss chard.  This stuff is beautiful!  Cram it in your pan, season to taste with salt and pepper, and cover with a lid or large plate so that it wilts a bit.

  Five minutes should be plenty of time.  Uncover, and continue to cook on low until the juices thicken and your meat is ready to come off the grill.  That's it!  So easy, so delicious, and so good for you.  (Really, adding the fat from the butter helps your body absorb all those fat soluble vitamins and nutrients!!)

Serve some good crusty bread (we used my favorite, Pane Paisano,  spread with some Herbs de Provence goat cheese) alongside your steak and greens to sop up the awesome juices.  Not your most elegant or visually stunning meal, but the flavor is totally going to seduce you.

Monday, February 8, 2010

In Praise of Focaccia

Jeremy's birthday was this weekend.  Unlike me, he was not cursed with a sweet tooth, so in lieu of cake he opted for some fresh baked focaccia.  This time with some thinly sliced tomatoes and rosemary from the hearty plant out front.  There are many good things about making focaccia from scratch.

The yeasty and warm smell of dough rising


The aroma of fresh baked bread permeating your house for the whole day


and most importantly,


The totally kicked up creations you can make with the leftovers.


My favorite recipe I've found so far comes from the Nordstrom Friends and Family Cookbook:

2 packages active dry yeast
2 cups warm water (105 to 115 degrees)
1 Tbsp sugar
5 1/3 cups unbleached all-purpose flour
2 1/2 teaspoons kosher salt
1/2 cup extra virgin olive oil
1 teaspoon chopped fresh rosemary
fresh ground black pepper


In a bowl, using a wooden spoon, stir together the yeast, water, sugar and 2 Tbsp of the flour.  Let stand until foamy, about ten minutes.  In a large bowl, stir together 5 cups of the flour and 1 1/2 teaspoons of the salt, then form a well in the center. Pour the yeast mixture into the well along with two Tbsp of the olive oil.  Stir with a wooden spoon, incorporating the ingredients until a soft dough forms.  Use floured hands to mix the dough when it becomes too stiff to work with a spoon.
Dust a work surface with the remaining flour (about 1 1/2 Tbsp).  Turn the dough out onto the work surface and knead ten minutes, adding the flour if the dough becomes too sticky.  When the dough is smooth and elastic, shape it into a ball and place it back into the bowl with 1 Tbsp of the olive oil.  Turn the dough once to coat.  Cover the bowl with a damp cloth and allow the dough to rise in a warm place until doubled in bulk, about 30 to 45 minutes.  Punch it down, cover, and allow to rise again in a warm place until doubled in bulk, about 35 minutes longer.
Use 1 Tbsp of the oil to grease an 11 x 15 inch rimmed baking sheet.  On a lightly floured work surface, spread and press the dough flat until it is about the same size as the baking sheet.  Place in the prepared pan.  Cover with plastic wrap and let rise one last time until doubled in bulk, about 15 minutes.  Poke a pattern in the dough with your fingertips.  Position your oven rack in the middle to upper two thirds of your oven and preheat to 425.
Sprinkle dough with the rosemary, remaining teaspoon of salt, and pepper.  Drizzle evenly with the remaining 4 tablespoons of oil and bake 18 to 22 minutes or until golden brown.  Serve hot.


This recipe looks long.  It might look complicated.  It isn't!!  Even if you are a novice baker, you've got a great shot at impressing even your most skeptical relatives with this one.  A few changes I've made to the recipe:
Mix an additional teaspoon of chopped rosemary and one thinly sliced clove of garlic into the dough.
When dough has been formed and pressed into the baking sheet, additionally top it with thinly sliced tomatoes, a sprinkling of grated parmesan or a white/yellow cheese of your choice.  Also, do you want this to be even easier?  Good.  Me too.  That's why I do ALL the mixing and ALL the kneading in my stand mixer.  If you have one, please use it.  Unless of course you need to unleash some stress and make that dough pay with your hands and you just dare someone to try to stop you...

Here to our left you will notice maybe the most superb methods of transforming your leftover day or two-day-old focaccia into pure bliss.  It's also super easy.  After you've had enough morning coffee to avoid cutting yourself, split a square piece of focaccia about the size of your hand into two thin layers.  One top and one bottom.  We're making a sandwich- not a rocket.
Toss a piece of breakfast meat into a skillet on medium.  Country ham is about as quick, easy and delicious as it gets.  Canadian bacon is a tasty and more calorie-conscious choice, but man would some bacon be sublime!
Cook until it's done (a matter of a minute and a half for country ham!) and put it on your bottom layer.  Cut the cheese.  I know I am juvenile, but I get my smiles where I can, okay?  Use a sharp cheese that is full fat for optimum results.  Top the bread and meat with the cheese and put in your toaster oven or oven just until the cheese melts.  Take it out carefully.  While it gets toasty, fry up one egg.  I like my whites firm and my yolks runny and saucy!  Egg goes on top of ham and cheese, sliced tomato goes on top of egg, fresh ground pepper, top with focaccia half, WHAMMO.  You'll love me for this, I promise.

Still have a little leftover bread the next day?  Me too.  So I have a pot of soup on that I plan on topping with these little beauties before polishing off a nice big bowl.
Homemade croutons take almost no effort and the flavor payoff is fantastic.  Avoid buying croutons if you can.  They're even delicious made from stale store bought bread.  Cut into cubes, toss in a Tbsp extra virgin olive oil, season to taste, bake at 450 for ten minutes or until golden brown.  Shake the pan once during cooking to ensure even browning.

If you have read all the way down to this point, I congratulate you!  Thanks for staying tuned.  I can't wait to hear how your bread turns out!

-Melody


Pin It

Wednesday, February 3, 2010

Moles (Not the kind on your face)

So a sled was indeed procured.  I really was convinced my dad's old Radio Flyer sled was still hanging in my parents' barn, but like many other things I have been searching for lately, it appears that it too fell victim to Yard Sale Purging Syndrome.  Turns out Jeremy's dad's old Flexible Flyer was still hanging around his mom's house.  So the dashing young lad went dashing very carefully to his mom's house to fetch it so we could do some Serious Sunday Sledding.

The trick is, you wait until after dark when everything refreezes and you find a road conveniently located across the street that is covered in one solid, gleaming sheet of ice.  You double up on the rickety sled and shove off until you reach a very unsafe speed.  You ride skillfully on one rail for several seconds before riding very unskillfully on your bare behind on ice covered asphalt for several seconds too long.  And then you do it all over again and take several ibuprofin in the morning.  Shame on you for not acting your age!

Anyway, what was it I said about moles?  That's pronounced mo-lays, mind you!  The delicious Mexican and Central American sauce so full of spice, smoke, and sultry richness it's sure to make you swoon.  I have been eyeing a recipe for Pistachio Mole in the Whole Foods Cookbook for quite some time, but I must admit I am mightily intimidated.  You should check out the list of ingredients on one of these sauces!  Not to mention the fact that there are thousands of variations on the theme since each family in some parts has their own traditional version using different seeds, nuts, or spices.  It was much too large a project to embark upon while in sledding recovery mode, so I headed out into the Great White Winter with my parents and sister to Torero's for some awesome pollo en mole. 

Mom is a sucker for fajitas, Lori got a grilled shrimp salad, and Dad made sure to point out to all of us that he had made the worst choice possible and gotten the worst taco salad ever.
Check out Mom's sassy tortilla chip eating ways.

Has anyone reading this actually made their own mole?  I mean roasted your own chiles, ground your own seeds, the whole enchilada, so to speak?  If you have, please for the love of mole speak up and tell me how you did it, how it turned out, and was it worth it.  As for Torero's, it was very good.  Not as good as the Enchiladas poblanas en mole at La Vaquita on Hillsborough Road, mind you, but good.

Oh yeahhh.

Saturday, January 30, 2010

Snow Day!

It just doesn't get much better than this.  This morning I woke up bright and early in true Melody Ann Snowday fashion, and started the day by gazing out the windows at a blanket of 7 inches of snow and sleet covering everything in sight.  While I sipped on my favorite Whole Foods Pacific Rim blend coffee, and carefully chewed my steelcut oats with maple syrup, vanilla and raisins, I pondered what the day might hold for me.

Baking!  Sledding?  Snowman!  Soup!  You know what I'm talkin' about.  So I put on my many mismatched multicolored layers and busted out the cookbooks.

Priority number one on days like these is always snow cream.  So I waddled out the door, scraped mass quantities of still-falling snow off the hood of my car into an enormous bowl,  added some skim milk, vanilla, brown sugar (looked like dirt!), and maple syrup and whipped it into a snow cream frenzy.  Pour into a tall glass, gulp, freeze brain, feel five again.

Next up: exploratory walk.  Is that slushy looking part out in the drive really slush?  No.  Rock hard ice.  Is it really just a dusting that looks deeper because of drifts?  No.  It's really at least 7 inches deep and still going.  And really, really slippery and potentially hilarious for a clumsy person like myself to be out in.  Does it make proper snowballs/forts?  Not yet, but it's getting there...

After a very brief exploratory adventure, I surmised it was high time for some hot comfort in the form of my mom's fantastic chili.  See Exhibit B.
Alright, what's next?  Baking.  Sundried tomato herb garlic rustic loaf, to be specific.  I used the most random recipe out there.  We're talking like page 6 of a Google search from a lady in Great Britain who is definitely not a professional.  But neither am I, so I figured it must be a perfect fit.  I have to say, it smells absolutely fantastic right now as I wait for it to come out of the oven.  I did have to add a substantial additional amount of flour, and it didn't rise quite how I was expecting, so I anxiously await the finished product.  

So the taste is great, but I have to say I would have cooked it at 400 or 425 rather than 450 for 30 minutes, as the crust got a little dark.  It's better alongside a light soup since it's so dense.  I'm glad to have it, but I think I'll go with a simpler loaf next time.

After another outdoor adventure to the interstate, (which looks just like my driveway), I think I might need a glass of wine to warm me inside and out!  Now on to my next adventure...

I have no sled.  Must.  Make. Sled.

Sunday, January 24, 2010

Rainy Sunday

I love weekends like this one.  Laid back, nothing on the agenda.  Yesterday I kicked off my Saturday by making some biscotti for my friend Sara.  We had a shopping/wine imbibing date scheduled, and I wanted to surprise her.  One of my favorite combinations ever in food land is peppermint and chocolate.  Sara has always hated this duo, yet subjected to it at least once a year when my birthday rolled around and we all had mint chocolate chip ice cream cake because let's face it- it doesn't get any better than that.


The stars have realigned and Sara is now quasi-obsessed with this new combo.  So mint double chocolate chip biscotti was a must.  The recipe I used was modified from a Weight Watchers recipe (who am I kidding, we all know I was going to eat some of Sara's biscotti).  Although it's not bad, it's not my favorite, so I don't think I'll share the recipe on this one unless someone really wants it.  I was quite proud of my little wrapped biscotti parcel though.  I didn't have any decorative disposable food containers, so I wrapped the buggers up in some parchment paper.


So off I scampered to Wine Authorities for some fun wine tasting followed by shoe shopping and completely forgot my little parcel!  Ah well, such is life.  After a lovely afternoon of shopping, it was time to fire up the grill.  It was time for Jeremy to fire up the grill, rather.  He had gifted me with some parmesan reggiano and some crusty bread from Whole Foods still hot from the oven to go along with our beautiful London Broil.  I like to keep the seasoning simple for really beautiful cuts of meat, so I stuck with a generous rub of pink salt and course ground black pepper.  So while Jeremy Grill Master fired up the grill, I sipped on a glass of incredible Dom. de la Bouysse, Corbieres Rouge "Mazerac", Languedoc, France 2007 (say that three times fast) and cooked up the broccoli.  One large head of broccoli cut into spears gets steamed only until bright emerald green and slightly tender.  Meanwhile,  two thinly sliced cloves of garlic get nice and toasty in two teaspoons of olive oil with one teaspoon of crushed red pepper.  When garlic has browned, squeeze the juice of one whole lemon in the pan.  Let it continue to cook down until broccoli has finished steaming.  Toss with broccoli.  Take steak off the grill when medium rare and let it rest for five minutes before slicing against the grain. The meal was rounded out by the crusty bread spread with some local herbed dill goat cheese from Celebrity Dairy.

Simple, delicious, and one of my favorite weekend dinners.


Another favorite I haven't had in quite some time is homemade pizza.  The whole wheat dough is proofing in my fridge, I'm listening to some Robert Earl Keen and Johnny Cash, and about to cozy up with a nice cup of coffee.  I hope you're having a wonderful Day of Rest.

Friday, January 22, 2010

Poblano Prelude to the Weekend

So sometimes you have one of those, "what can I cook with the very odd things in my pantry/fridge," nights.  That was me tonight.  But then I had this idea.
Take four poblano peppers and split them down the middle.  Place them on a baking sheet.
Drain a can of tomatillos (sort of like green tomatoes that you can find on the hispanic aisle of the grocery).
Place them on the baking sheet.  Broil both until browned/blackened on the outsides and discard the browned or blackened skin.  (It peels right off, so it's pretty easy).
In a blender or food processor, blend the tomatillos, two cloves peeled garlic, juice of one lime, half a chopped onion and a handful of cilantro leaves until smooth.
In the meantime, cook some jasmine rice until tender or as the package directs.  When rice is done, combine with the tomatillo mixture, the other half of the chopped onion, and one diced and seeded jalapeno.  Spread rice mixture on the bottom of a 9 x 13 casserole dish before topping with the poblano pepper halves.  Top with shredded reduced fat or regular cheddar cheese.  Bake for 20 minutes at 350.  Sprinkle with sea salt before serving.  Top with a dollop of greek yogurt and some chopped green onions or chives if you have them on hand.
It's pretty yummy,  but even better accompanied by a stout glass of red wine.  I am drinking California Frontier Red, which stands up to this dish perfectly.  I think it would be even better if you added some seasoned ground beef to this dish (or picadillo), but it's tasty cheap chic as is.  Let me know what you think.  Buen provecho!

Thursday, January 21, 2010

Ode to the cupcake

First thing's first.  Pesto is delicious.  What happens when it's freezing outside and your basil is dead?  You make sun dried tomato pesto!  I made a lower calorie version, but I really don't think you'd be able to tell.  Another admission-  I am obsessed with my Magic Bullet mini blender.  Yes, the one you've seen in infomercials.  Laugh if you must, but it gets the job done with as little fuss, mess and effort necessary.  I'm pretty sure a few of my coworkers have seen me do this infomercial...
Anyway,  cram the following objects in your blender, food processor, or Magic Bullet (should you be so lucky) and blend well:

1 cup sun dried tomatoes (you'll need to plump them in hot water for a half hour prior and reserve the leftover wather
2 Tbsp grated parmesan (spring for the reggiano variety if you can; there's no comparison)
2 tsp red pepper flakes
2 Tbsp extra virgin olive oil
Fresh ground black pepper to taste
1/4 tsp salt
1 cup water reserved from plumping tomatoes
2 Tbsp dried Italian herbs or one cup fresh basil
1 cup fresh baby spinach (only if you're using dried herbs)

Bring one pound of whole wheat spaghetti to a boil and cook for ten minutes.  Drain, toss with the spaghetti, and serve garnished with fresh herbs if you have them and parmesan.  I did not have fresh herbs, and I could not afford the reggiano this time, but I must say I was pretty pleased.

Not the most beautiful presentation, and not the most beautiful dish, but it was tasty and satisfying, and that's all I am asking for on a Thursday night.

So I have recently been captivated by the cupcake beauties captured on camera at SugarLush, a blog I have been following, so I felt it my duty to make some snazzy cupcakes.  I found a recipe for chai cupcakes with buttercream frosting at TasteBook that looked yummy.  I decided to recreate them, but using Orange Spice tea instead.  I'll test them on my coworkers tomorrow and see what they think.  I had to sneak one just to be sure it was fit to eat.  It's pretty spicy delicious!
I'd love to hear about the best cupcake combos you've tasted or heard of.  Any ideas out there?
Thanks for the input.  You guys are so awesome!

Monday, January 18, 2010

Back to Basics and Canstruction

There are a few things I simply refuse to buy because they are so much better and cheaper made myself in almost no time.  I don't buy any sort of pre-peeled or pre-minced garlic.  Not only does this exposure to air and jarring process make the garlic not taste as good, but then I would miss out on the garlic smell on my hands which I admittedly LOVE, even after the meal is finished.  It lingers like such a sweet memory.
I will not buy salad dressing.  You would be amazed at the amazing flavors you can concoct in just minutes with the most basic and cheap ingredients.  (My favorite of late is a curry mustard vinaigrette, but I digress...)
I will not buy pasta sauce.  Let me expound on this a bit, if I may.

I never ever ever (except for by accident on very rare occasions!) let myself run out of fresh onions, fresh garlic, and canned tomatoes of some sort.  With these three staples, you will never be sauceless.  How long does it take to make, you ask?  Barely a flash.  Here's how:

In a heavy bottomed saucepan on medium heat, pour in enough olive oil to just coat the bottom.  (I usually use about 2 teaspoons).  Finely mince or crush several cloves of garlic, depending on how strong you like your garlic flavor.  I LOVE GARLIC, so I usually use 3 large or 4 medium cloves and I like to mince them very finely since the smaller the mince, the stronger the flavor.  (More surface area if you're a geek like me that likes to know why).  Try not to let the garlic brown too much, as this will make it bitter.  The trick is to constantly stir it around.  Add in crushed red pepper flakes to taste almost immediately.  You're ready to pour in a large can (15oz) of tomatoes as soon as you smell the heat from the red pepper.  If you are doing this, you'll definitely know what I mean.  It tingles.  Once you've dumped them in, turn your sauce down to medium-low heat and give it a good stir.  If you used whole canned tomatoes, now is the time to smash them.  If you used crushed, diced, or pureed, you can just walk away. 

Let the sauce come up to a simmer and add in any herbs you wish.  Italian seasoning, basil, oregano, savory, a bay leaf, etc.  I like to use Italian seasoning, one bay leaf, and a little extra basil. I usually use tomatoes with salt already added, so I don't add any additional salt.  You're sauce is ready when you're happy with the seasoning.  Use it as a pizza sauce or a pasta sauce.  Dilute it with chicken stock for a great minestrone soup base.  Try it, and let me know if I've converted you into an ex-commercial-pasta-sauce-consumer.

In other news:
Here I am in the news:
     
The News and Observer, that is.  Every year our office (Duda/Paine Architects), competes in Canstruction, a themed contest benefitting the Food Bank of North Carolina.  This year's theme was super heroes.  Naturally, we chose to construct an eight foot Super Smurf (complete with cape) from 6,500 cans of Kroger Chunk Light Tuna.  Suffice it to say, we rocked it. 

Check us out killing it time lapse camera-style on YouTube:
Duda/Paine Smurf Squad Extreme

Thanks for checking it out!

-The Redhead in the Kitchen

Sunday, January 17, 2010

Melody Had a Little Lamb

So it's been a bit of a rough week, but it's time to get back in the saddle.  So here I blog again!  It's good for me.  Time for some cooking therapy and good vino.

Lamb was on sale tonight at Whole Foods, so I couldn't resist.  I picked up half a leg of lamb to butterfly and throw on the grill.  I haven't cooked Broccoli Rabe before, so I decided to pick some of that up as it was on sale as well.  At the moment I've butterflied the leg of lamb.  This just means cutting through the thinner side of the meat about 2/3 down and splitting it open so it looks like a steak.  At present it's waiting patiently for the grill while it soaks up a little olive oil, 1 tsp dried thyme, 1 sprig chopped fresh rosemary, 3 medium cloves minced garlic course salt and course ground black pepper:


Meanwhile, I sliced a medium white onion and started to caramelize it in a 1.5 Tbsp olive oil.
When they started to pick up some color, I added in a dry pint of baby portobello mushrooms I sliced thinly and a large clove of garlic.  Once the mushrooms brown, I seasoned with sea salt before adding in one bunch of broccoli rabe, coursely chopped.  Toss and cover with a snug fitting lid.  The lamb goes on the grill.  Until it hits that medium rare stage or an internal temperature of 150, my hard work consists of sipping on some Chateaux Bolchet I picked up at Wine Authorities.  I encourage you to say this out loud.  It cheered my day.

The lamb comes off the grill at a nice medium rare and rests for 10 minutes before slicing to ensure the juices don't come gushing out when the knife cuts through.  A good crusty Pane Bello from Whole Foods was just the thing to sop up the juices.  When it all came together, it looked like this:
I have to say, the lamb was pretty tasty.  I found that the Chateaux Bolchet, while it was drinkable and tasty on its own, was even better when paired with the earthy and meaty flavors of the lamb.  The broccoli rabe had some bitter, almost cinnamon-like flavors which were nicely mellowed by the mushrooms and onions.   I still think it might be a little too bitter for my taste, but I am glad I tried it.  Thanks for reading; it's so fun to share these cooking adventures with you!  I will definitely be posting more this week.  Next up:  Asian Endeavors with water chestnuts!  Stay tuned...


Pin It

Sunday, January 10, 2010

Pork. 'Nuff said?

So thanks to the generous lovelies that gave me a Trader Joe's gift card for Christmas, I was able to stock up on some delicious ingredients this week.  I have been craving juice (pretty much any fruit juice indiscriminately) for a few weeks now.  So one of the first things I picked up was some antioxidant-loaded pomegranate juice.  Aside from making lovely cocktails, turns out it makes a pretty awesome pork marinade as well.  For the marinade, I used the juice of two small oranges, 1 tsp orange zest, 2 cloves minced garlic, juice of one lime, 1/3 cup pomegranate juice, 1 Tbsp dijon mustard, dash of cayenne pepper, and salt and pepper to taste.  Let my 1.5 lb. pork loin roast soak overnight (although it could be ready in a couple hours) before grilling that baby.

While that is busy working its magic in a large plastic bag in the fridge, try mixing this up:
In cocktail shaker full of ice, shake one shot Grey Goose Citrus Vodka, one shot pomegranate juice, the juice of half a lime, and some Cointreau or other orange liquor if you have it.  Pour in a martini glass.  If you are like me and do not own that type of glass, pour it in a tall glass with ice and top with a little club soda.  Yummy.

It's been so cold outside lately, I was really feeling the need to experiment with some homemade bread.  So I followed the recipe in my Nordstrom Cafe cookbook for rosemary focaccia, and added a little sliced garlic.  Here's how it turned out:
I gotta say, it was pretty tasty.  But next time i would double the amount of sliced garlic and rosemary garnish on top and add a few very thinly sliced tomatoes before baking.  A little course Australian pink salt on top made all the difference.

Next up:  I removed the pork loin from the sauce and put the leftover used marinade in a small saucepan.  Bring it to a boil and simmer until it's reduced to 1/3 its original volume, and you have a tangy and wonderful finishing sauce.  Meanwhile, Jeremy tended the grill while I whipped up a salad.

For the salad:  2 cups arugula, a handful of dried cherries, 1/3 cup crumbled bleu cheese, 1 oz. crushed cashews, and 1/2 cup sugar snap peas get tossed with a citrus dressing.

For the dressing, combine the juice of one clementine or tangerine, 1 lemon, 2 pearl onions or one shallot, 1 Tbsp chopped fresh parsley, 2 tsp olive oil, and salt and pepper to taste.  Give it a good shake and toss with the arugula mixture just before serving.

I chose a merlot for this meal (I used the Whole Foods house brand which set me back a grand total of $6), but you could go with a nice Zin as well.  I was pretty pleased with the final product.
I dedicate this blog post to my best friend and sister, Lori, who faithfully reads all my self-indulgent dribble and is my biggest cheerleader.  Poor baby LoLo, I applaud you for your bravery in having all four wisdom teeth removed this week and still being "cheeky" enough (no pun intended) to set me straight and tell me what's what.

After a great weekend, it's back to the daily grind.  Let's make the most of every hour this week, shall we?


Pin It

Friday, January 8, 2010

Mon Petit Cabbage...

So I might have felt a little bit like Pepe la Pew when I came across these beauts.  I had never seen brussel sprouts for sale on their stalk!  It was truly a thing of beauty and a source of inspiration for what could have been a beautiful meal. 
While my roasted chicken and brussel sprouts in a lemon dill cream sauce tasted pretty great, it wasn't so easy on the eyes.  The wonderful thing about cooking is how much you can learn from your own mistakes.  For example, a sauce containing dairy and citrus can look beautiful in your saucepan and poured over top of your finished dish, but should you choose to cook it in a very hot oven for thirty minutes atop your chicken and veggies, it will NOT remain emulsified.  You will have a very clumpy and separated looking mess.  At least it still tasted good!  If you want to try this one, I'm sure it could look almost as beautiful as it could taste should you choose to roast the chicken and sprouts first and pour the sauce on just as it's finishing.  This was a quick meal using individually frozen chicken breasts you can find at Trader Joe's.  No need to thaw.

Preheat your oven to 425 or as directed for the cut and quantity of chicken you're using.  I used four breasts.  Cut sprouts off the stalk and score an "x" into the bottom of each cut sprout.  Why?  Because Julia Child tells you to.  I have no idea why, but I blindly obeyed.  Put all your sprouts (I used maybe a pound?) and your chicken in a roasting pan and into the oven for thirty minutes, turning the breasts over once for even cooking.  While your sprouts and chicken is roasting, find a small saucepan.
For the sauce, finely dice one yellow or white onion and cook until softened in a tablespoon of melted butter and two teaspoons olive oil.  Add 2 Tbsp flour and keep stirring until the flour, onion and butter mixture begins to pick up a golden color.  Deglaze with the juice of a whole lemon, scraping up any browned bits.  Pour in a cup of chicken stock and a can of skim evaporated milk (or some half and half if you really want to go for the gusto) and continue to stir while this reduces and becomes thick enough to coat the back of a spoon.  When it reaches this point, add 3 Tbsp chopped dill and continue to cook and stir for a few more minutes.  When chicken is five minutes away from being done, pour the sauce over the sprouts and chicken.  Serve over brown rice garnished with chopped parsely.  Let me know how it goes.

Pin It